Showing posts with label Game. Show all posts

Wednesday, 20 March 2019

Skirmish battle

At the skirmish show we were asked to put on a Sudan game. Everything was left up to Tim. He supplied the figures and the terrain and using the "Men who would be Kings rules by Osprey. I happened to notice they were used by some other clubs as well.

The battle we fought was a combination of two historic battles. With British against the Egyptians. In History Britain won both battles so could the beefed up Egyptians do any better this time?

Graham and Peter had the Egyptians while Gar and myself had the British. (Well at least 1/2 my troops were Indians from the Indian Division!

All photos were taken from my seat so a very limited point of photo view!


The Indian Division close to (my best troops)
 headed down the rail track to try to catch the train.
My Other division was to tackle the redoubts.
Gary was to take the redoubts on the far side of the table.
As Graham moved most of his troops up from the town.
I used  the trees as cover and brought fire on the closest redoubt.
Meanwhile as I looked around the show Another club member took control of my forces.
The result was a wild unsupported charge by my cavalry.
I can't say I would have done very much different as the cavalry did wipe out a unit of Egyptian infantry.
It is the kind of rashness  that left them exposed and pinned down under  the Egyptian Infantry riles.
Needless to say they all died in 3 or so turns.
Unable to pull the cavalry back I advanced with all the infantry.
Despite losses I did take a major redoubt and did force the
Egyptians back into a no mans land.
Gary was likewise doing the same and although he lost some marines
I had lost cavalry so was not in any position to feel smug.
He game ended as a slight British Victory.
We had taken 4 of the 6 Redoubts so we were equal on victory points with the Egyptians.
We had failed to take the train and the Egyptians still held 2 redoubts but were not in a fit stare to carry on.
If time and effort and energy had continued, but the show was packing up,
I have no doubt te British would have had a decisive victory. But time was up and we achieved what we achieved in the time.


Conclusion: Hard to finish a game at a show unless it is a skirmish game. But I suspect "Her majesty" would have approved as no awful reports of a British massacre reached "the times!" To make this a very competitive game though the Egyptians should have been given more Omph or at least more reinforcements. But 20/20 hindsight is a marvellous thing.

Sunday, 13 May 2018

Yesterday atthe club

My Tank
A Panzer 2
I was having a 5H1T day yesterday, everything I tried went wrong. And then I got to the wargames club. and things went right (at least until I left). Ahh the joy of a decent hobby.

I was going to play Matt at Aeronef, but I broke 2 models looking for the fleet and dropped a box of figures. So I phoned Matt and he was "Don't worry we can do something else!" We did do something else, we both Joined a game of "What a Tanker!" which was run by Graham.  This time it started with me and Graham as the Germans and Dick (aka Richard) and Matt playing the British.

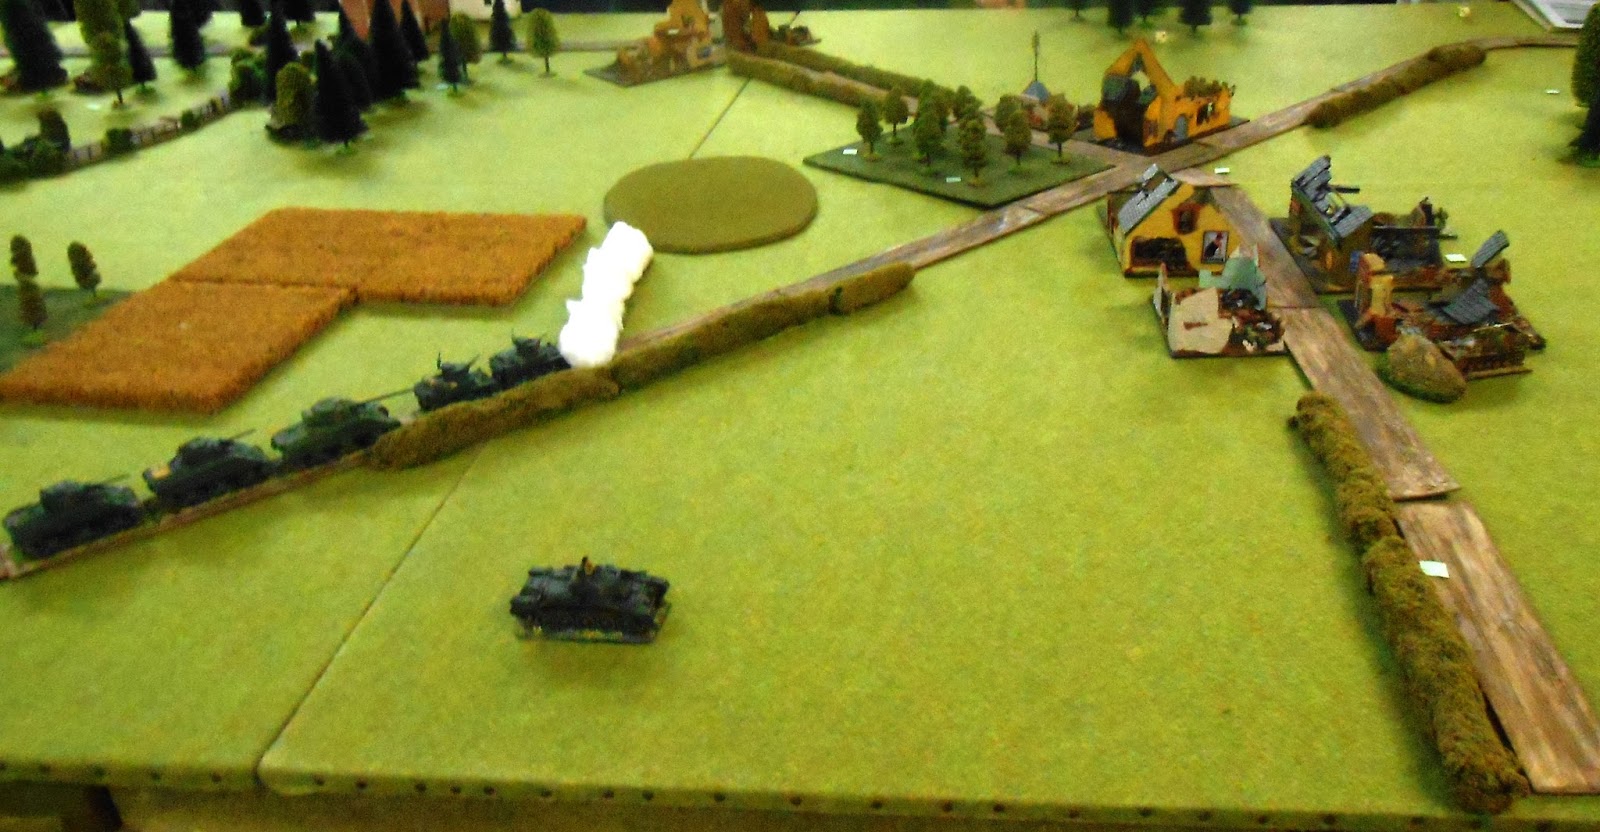
The map from
my seat.
 Both the British were in A-13 Crusiers which I had used last game so I knew they were an OK  tank for the period I was in as already mentioned a Panzer 2 while Graham had a Panzer 35 T which is (game wise) exactly the same stats as the Cruisers. So it was even on points.

The map was a little more open than last time and having almost no armour and a little pop pop cannon I was going to be reliant on using any and all cover I could! (Gulp)


Das Hero Panzer(yeah right)


Dick Tank


Grahams Tank


Matt's tank


As Dick shot at me and missed. I was suffering
from cruelty to small tanks Syndrome.
Yes I ran away and tried to put a hill  between us.
It did not work and he shot at me again.
and again missed


Matt went hull down and Graham  started shooting at him


Richard felt confident and pushed forward determined
to persecute a small and weaker tank

But My tank had teeth.
I was able to circle around and By using the Building
as a covering piece of terrain
get behind him and fire into his weakest parts.
 

Despite being hull down Matt takes enough hits to drive him back
 and then destroy him.

Graham takes cover from the 2 new British tanks

Richard tries again to be needlessly cruel to small and cute  small tanks
 and pushes forward . Trapping me behind the building

Matt's Second tank dies easily on the next turn
having only been on the table 1 turn

The cruelty to small tanks continues and Richard sets me on fire.
Seriously guys there needs to be a law against cruelty to small tanks


The game did not end here 2 more people joined in. And now I took charge of a panserjaeger 1. (the weakest of all Tank hunters). Naff armour but a good gun for the period.
 
And I turned it around. even if I took no pics. Graham lost his tank and brought on a second 35T. Kev joined the Germans in a Panzer 3 and Tim joined the Brits in another A13 cruiser tank.
 
After a while the game ended.  and the battle field was strewn with tank wrecks. Some German but more British. The only survivors were Matts Bailed out crew on one kill. Grahams crew on no kills and my crew on 4 kills.
 
I know that next time we play they will all target me especially if I am in a Tank Destroyer. Not just for revenge, although I am sure that will be a factor, but as much to stop me becoming an ace tanker and getting an advantage or two. The rotters. (I am sure I would do the same though so I can't really complain). Either that or they will all start to take German panzerjaeger 1's so do not buy any more Graham.
 
 
That's it for now. As no pics you are free to believe I did not do so much damage and I will not blame you even to me it seems far fetched and unlikely! (And I was there, in front of witnesses)
 
Enjoy the day. Play if you get the chance and dream if you can't play
All the best Clint

Sunday, 6 May 2018

BTR APC 15mm for Ak47

yes another vehicles  for AK-47 despite the face I have not played it for over 2 years! I was not a fan of the re-write and as such it as a game fell out of favour with me. yet despite this I am still building up an army. Sheer madness I tell you but what else is knew!

This is actually the Zvezda kit of the BTR 80 at 1/100th scale. yeah I know it if not true 15mm but it is close enough for me.  We can all get perdantic. This is my first and Only (so far )armoured personnel carrier for AK 47 But I hope to get one more. Like all the Zvezda kits they are easy to put together and assuming you have at least 1/4 of a brain you will get all the pieces in the right place. I am not saying they are idiot proof but pretty close!

Overall a worthy addition to the AK force. And while only (in the rules) able to carry 4 stands at least that is 4 stands they will not have to walk to the battlefield!

Yesterday I went to Rochester Games and Model shop Yes here is a horrible Face book link. (I say horrible as I do not like Facebook) Link and I am sure if you live in the Medway towns you are at least aware of them. While there MHWC (Sittingbourne wargames club) and they had a game of Rapid fire going on. this is turn 1 and 2 in the photos I had real life to get back to.  As usual with ww2 game far to many tanks. A realistic ratio is 1 tank to 600 soldiers.  But we all do it.
Things when I left were not going in anyones favour. Yes the allies had lost more vehicles than the Germans But the Allies were ambushed and they would be able to replace their vehicles which at this stage of the war the Germans would not. My advice to the allies would be pull back and call in air support and let the infantry move it to mop up. hell but no one asked me and I was not playing so it was all up to them. But at this stage of the war the Germans could not afford to loose tanks or Fuel so no matter how the game was played the Germans were bound to loose!

A very Jaundiced view I realise, but that was the truth at this stage in the war. Why through away lives, call in air support and sit back and make a brew!

Should have some figures painted by Tuesday so enough of Tank and Tank things for a while. All the best and enjoy the long weekend!


Sunday, 17 December 2017

A Long over due post!

Last week at the club we had a game of "Canvas Eagles!" a WW1 aircraft game. I did play but I contributed nothing on the way of planes or terrain. So neither applaud me nor criticise me as I was but a mere player.

Some players think terrain is important, others think well painted figures yet others think it all comes down to the rules. The rules for this game are very good but you will never understand that from photos. And teh game DOES play very well indeed but for me I would like it a little more pleasing on the eye. But that is my only complaint!

I flew an Albatross III a german plane it is a good alrounder but fails to excel in any areas but then again nor does it have very many weaknesses given the time frame we were allotted. So generally I was quite happy.

Over the course of the day I had 2 planes. The first plane had very little damage at all but did run out of fuel and left the board with just enough to limp back to base if it glided some of the way. My German commanded was not happy with me leaving the game and did suggest that I would be court-marshalled when we got back to the hanger. Personally I think I needed to leave with the fuel I had left or else I would not make it back to the hanger, and neither would the plane.

So I started another plane again an Albatross DIII this did get a few more holes in it but by the same token it did put more holes in the British planes. I hasten to add that my planes either singally or together gid more damage than they received. so I think they performed well and did all that was required. I did not shoot anyone down and neither was I shot down. So just an OK flight with no disasters and no going back to base for tea and medals.

That's it for today. And I will be back as the paint this morning.

Kindly let me know if you want Mad max or Back of Beyond next. I should have both finished this afternoon and what I do not show Tuesday will get seen on Thursday.

Until then, take care have fun (at least twic as much fun as me if possible) and I will see you all soon.

Cheers Clint


Sunday, 9 July 2017

Yesterday at the club

Well I was not there long.  But while there I was able to play the walking Dead all out war 3 times.

The first game was mostly a dry run though to give the players an idea of the rules and the set up and just how the game worked.

Let me start by saying Ian won the first game. WE only played the basic set so really no frills at all. Just basic rules a few figures and I was referee.

Not our game just an Internet image.
I forgot the camera again
But a cool Thank you
to whom so ever posted this image
on the internet
The Second game (Yay I won) as a 3 way battle just grabbing loot and getting off of the board. very simple and very apt.

The third game was a similar set up but we moved the figures around so we all had different characters. This time I had Rick!

It was the only game where Rick got bitten by a Walker (Must remember not to say ZOMBIE!) got infected and died on the table! Guess who was controlling Rick. yeo me.

Kev won this game.

Conclusion: If playing 3 player games the "THREAT TRCKER" climbs the scale fast. Seriously fast. It was a joy that players realised quickly that making noise could be an offensive action as could running.  As if done correctly It could drag zombies into the melee and when facing 3+ zombies you were very limited in what you could do. And the chances are you would lose the melee.

Overall it was a very good game and a game we will play again. But first I need to get painting the figures as several times we were having trouble telling Walker from survivor as they were all the same colour plastic.


Changing the Subject:

I have also volunteered to paint some 28mm figures for a LOCAL show game. These will be Nappies and I do not usually paint Nappies so it will be a steep learning curve. 12 figures to a unit so I will try to get 2 units done. (3 IF I can... but aiming at 2 Units) Just to take the pressure of off another club member. SO if/when you see Napoleonic troops on this blog you do not have a fit with your leg up you now know the reason.

Additionally: Only 1 of my Purchases from my prize have so far turned up. Yes I am inpatient and am itching to get on with it. BUT hopefully a little more will arrive this week and I can do a blog post all about it. I just put this bit in as one of my club members was unaware of my win.

Thursday, 11 September 2014

Setting up Sunday's game.

Another Post. so early what's going on! Well that I just don't know. here however are a few scenery bits and bobs for my upcoming game at the Reject "Shed of War" more of that later. Here I have 5 generic explosion markers as well as 10 craters. (I cropped the picture so you'll have to take my word!) They are from frontline wargaming and are very simple to paint. I did look on google for explosions then went and did my own thing anyway so this is not what explosions actually look like. I did my own thing just because I wanted them to look like this and not like the explosions on google. But if you get some feel free to make them more realistic. As for the Craters just brown and drybrushed with a lighter shade of brown and then an even lighter one! Not a lot m,ore to say about them at all.


The Main reason for the post today is that I will be playing a game in Posties Shed of war using my 10mm Spanish Civil War figures when I arrived the table was NAKID! As you can see which gives a different view of the shed of war to any I had seen before. So I set up a 6 foot by 8 foot board!

When I left though I had all the terrain set up and Postie had positioned his first few figures. So I thought it was worth a look at what the table would look like prior to the game starting and the hordes mucking the game up erhm I mean carefully considering actions and reaction in a wargames environment! (Yeah mucking it UP!)
The left hand side of the Picture is North West and the Right is south east. The Nationalist will be on the left and the Republicans will be on the right.

Ray, Lee and John will have the job of defending the road and farms on the Republican side right side of the picture. While Postie (everyone said he had to be a Fascist so I put him in charge of the right wing Nationalists), Surgit and Smiffy will be attacking from the left! Postie has already started setting up his starting positions and allocated where his "subordinates" will be. Ray has yet to do this but will do so either this anytime between now and Sunday morning. I have left him a brief note on a scrap of paper and while this is not sufficient to warrant a detailed objective I will (eventually) email him more instructions. (Maybe Saturday Morning at 3am hee hee..... can't give him too long to plan!)

Final thought

Seb has kindly volunteered to take over "San Francis" in the PBB game and will do so with immediate effect! So can you all kindly get your turns in (those yet to do so) by 9am GMT on Saturday. That way I can post an update on Saturday morning!

All the best folks take care and roll some dice... but roll high! "Anything but a One!"

Cheers Clint


Monday, 21 April 2014

Patrols in the Sudan.

Well yesterday at the club we had a trial game of "Patrols in the Sudan" (PITS) by Peter Pig. I was the ref and Tim took control od the Anglo Egyptians (here after called British) and Graham and Matt took control of the Mahdist forces. Obviously we all make mistakes the first time we play any rules so I am sure mistakes were made yesterday but here is a very brief description of the game.

The Mission was mission 1 from the book and Tim had to Take a patrol up the board and scout a village for enemy troop concentrations. Graham and Matt had to stop him. It was a there and back patrol and being the first one in the book I assumed it would be straight forward.

As Tim's force had a single Cannon he bought that on first and set it up covering the battle field and sent his three scouts ahead. The Scouts failed to scout any terrain to begin with and when they did One scout was ambushed and died instantly Matt bought his poor quality unit out of hiding and managed to shoot the second scout down. Leaving Tim with just one scout. They then rolled on table 1 allowing then Sudanese to bring on an extra piece of terrain! (One of the peculiarities of the rules is that the terrain may change as the game evolves. This may not suit all players as the game does become something of a hide and seek game with the Dervish popping up and disappearing quite rapidly!) So Graham brought on a depression in front of Tim's gun, Creating some dead ground.

Tim then managed to bring on two infantry sections each with an officer and Sargent. Foolishly the young commander Tim split these two sections and rather than have them work together sent them as independent elements up the table. This meant no covering fire as they were out of each others firing arch and  rifle range. One he kept in column  to quickly advance up the board. And Boy yes it did! The other in line crept forward.

Tim's final Infantry section arrives and his last remaining scout comes back to search the depression in front of the cannon he has set up. Matt is able to move his poor unit to where the Column  Infantry is  and despite Tim's attempt at opportunity fire The Mahdist  Unit fell on the column and forced a morale check which sent them fleeing from the board.

Mat was not able to hide the poor quality unit quickly enough and Tim's cannon opened up. Due to the long range and intervening terrain Tim only inflicted one casualty. And thus in the following turn they managed to Hide and reappear in the depression in front of the cannon! The following turn saw them reappear and fire a ragged volley into the cannon, killing the officer and the crew! They then about faced and close assaulted Tim's last scout. Being only a single stand scout it died quickly.

The following turn Tim was able to bring up his third section and Form an edge to fire into the Mardist troops. His other line section went into line and trekked up the table as fast as possible. Graham had a unit of uncommitted Dervish and made them appear by the British and led a charge into them from the flank! Tim's opportunity fire did not stop them and melee was joined. Matt and Graham both managed to get melee attacks onto Tim's foot troops but after 2 turns of melee that section of British heavily out numbered gave up the fight and fled the board as well.

So poor Tim only one unit remaining approached the objective in column. He mad a successful scouting check and located the rest of the Mahdists forces all he had to do now was get back. But due to the rules Graham and Matt were able to "teleport" troops from terrain to terrain and thus it was not long before the British were attacked again.

A veteran fuzzi-wuzzi unit was next able to charge the British. Being only melee armed they had no choice of standing back and firing so they just charged. Tim Rolled good dice and bought sufficient guns to bear. This was not enough to make the attack falter but it would mean that in a morale check the fuzzis would be up against it. In the melee though it was a fuzzie victory. Not sufficiently strong to make the British do anything else but fight on. So Graham hit them with another unit. Despite already being in melee Tim's men managed to fight this one of and sent the Mahdist reeling back with a failed morale check.

Recovering their wits the Mahdists once again charged and while causing casualties to the British were forced back again. But against the Veteran Fuzzies they just did not have sufficient troops being down to the officer and Sargent and a single rifle stand and eventually they also had to flee from the table routed.

Overall: The rules were a bit "Clunky" and did not flow as well as they might. They were adequate for the job and some nice ideas involving hiding troops and not starting with all the terrain on the board and being allowed to bring it on when dice rolls allowed. For me though they did not have the feel I was looking for. So next time I may well try Black Powder!

Thanks for reading and more again in 2 days . All the best Clint. 

Monday, 27 August 2012

PBI AAR

My Army list. All Average quality, Aggression levels 1,2,3,4.
Command Platoon : Command stand and 5 stands of riflemen (Garand)

1st Platoon: Platoon Commander, 5 Rifleman stands (Garand), 3 LMG stands (BARs) 1 Bazooka stand.

2nd Platoon: Platoon Commander, 5 Rifleman stands (Garand), 3 LMG stands (BARs), 1Bazooka stand.

Support Platoon: Platoon Commander, 3 Medium mortar stands, 2 HMG stands,

Armoured support: 3 75mm M4 Sherman Tanks.

Total points 400 (Exactly)
Being a typical Peter Pig game you know from the outset that things will not go the way you plan. Graham my opponent had wanted to try the US army list out for over a year, wanting to see how Browning Automatic Rifles (BARs) and Garand rifles would work in the game, both being somewhat different from the standard LMG and bolt action rifles available to his Germans or Russians. He also wanted to try a Panzergrenidier force all half track mounted. So I chose an aggression level of 1. The most dug in and defencive stance possible, knowing that he would take a much higher aggression level. We went for the Random terrain. So random that 1/4 of the board was nude except for a single building square. Opps! Oh well these things happen. As defender I got to position the three objectives, seen above). The crashed aircraft on the road, The defencive command post (middle left) and the brown building bottom right. I also had three squares of prepared defences and 3 squares of "Potential" mines. One of the quirks of the game is that the defender nominates the table edge he want with the attacker forced to have the opposite. You then roll 3 times to see if the attacker can change this. Not wanting to defend open ground I gave that to him. We went through the Pre-game reconnaissance procedure to determine our starting forces. Being totally committed to defence my pregame reconnaissance was slow. As such I had to start the game with one random platoon. As it turned out my support platoon which was better than my command platoon, but still had no real anti-tank capabilities.
Graham started with 2 Stugs IVs, Company commander mounted on a motorcycle combination, and 2 full platoons of Panzergrenidiers in 6 Hanomags. I wanted some anti tank stuff at this stage I really did. You can just decern his force at the far side of the board while my 6 stands are clustered middle left. The German artillery strike drops short and my troops breath out. And then the rolling thunder of the mechanised infantry charge forward. (Attacker always gets first turn). I am a little surprised at just how fast they move. I should not have been but only having used Russian infantry in the past who can be reluctant to go forward I was in my head thinking that they would only advance 2 squares at most. Graham got the majority of his forces inside my minimum mortar range. GIT! The mine fields did slow him up and make him select a different route, but did not overly affect his plan. Shots were exchanged with no real casualties.
My turn. Starting with the mortars I noticed the motorcycle and side car were in range of the mortars. I fired the mortar and needing a 6 (2 dice rolled and results counted SEPARATELY) managed to get 1. So the mortar had hit the square. The German company commander needed 2+ to avoid being a casualty and so Graham rolls a 1. Result! Dead German company commander. The only other thing my mortar could target was the second platoon all in halftracks. I had no chance. The dice gods on the other hand thought differently. And the Mortars dropped with pin point accuracy on the Germans on my right flank who were heading towards the blue building. So how and I still don't know how, Graham needing "Anything but a one!" to avoid casualties rolled horribly. I am in shock now, the right flank is still not secure but I had stalled the platoon with a lucky mortar strike.
I rolled a 6 for the count down as well.
German turn 2. The Panzergrenidiers on my left were de-busing and getting "Tiggy". My Hmg was giving as good as it got though and I was still on a high from my ridiculously lucky mortar strike. Graham took a morale check for his troops on my right and they were forced not to advance. They could and did retreat one square and disperse to become three mortar targets as opposed to one large one. The Stugs firing at dug in infantry were mostly not hitting the target and definitely not causing me any casualties.
US turn 2. Having one artillery strike at my disposal, I played it. It arrived on time on target and chewed some holes in the debussing Germans, and managed to knock out a halftrack in the process. My Hmgs were holding their own and keeping the left flank secure. Given my success with the mortars on the right flank and as the Germans could not advance they were my only target any way. I plopped some more shells their way. Graham dice deserted him again and I managed to knock out most of their troops who were manning the inherent vehicle MGs. I am not saying it server them right for being in open topped vehicles, just that the dice were on my side again.Again I rolled another 6 for the countdown.
German turn 3. My HMG position got overrun. they had done a good job, but eventually they were just out gunned the the German first platoon. The rest of the German shooting, especially from the Stugs wasn't up to much really.
Us Turn 3.  My turn was over quickly a couple of shots with the last Hmg and still dropping mortar shells on the German second Platoon.
German Turn 4. Morale tests for the German first platoon forced them to retreat back to hard cover. Being that this was the very open board there was only one place for them to go. so the slipped into the outskirts of a village and started the second MG duel. The German second Platoon failed it's morale check very badly and retreated off the board. Graham took it well but would not give up the fight. He advanced the two stugs and machine gunned my last HMG at point blank range.
US Turn 4. My Sherman tank support arrived. On the board at last now I had something to worry those Stugs. Or  to put it another way the Stugs had better targets than the dug in Mortar teams. The Shermans turned up and one died instantly. One got a shot off, hit but failed to penetrate.  The German sniper fired for the first time and pinned my support platoon commander and one mortar team. Seeking revenge I drooped mortar shells from the other two mortars on the edge of the village. To no effect. The count down was getting critical now and still the bulk of my infantry had not arrived. But at least I had the Sherman's.
German turn 5. German reinforcements. A support section, single sdkfz 251 with a command section a HMG and a mortar appeared at the table edge. They had enough action points to drop a single mortar shell onto my defenders. SPLATO! Graham had leaned how to roll dice. DRAT! result the death of the support platoon commander and my last HMG. So only 3 mortars and 2 Sherman left. But the attackers had no infantry to take any of the objectives. Graham trundles a stug forward onto my casualties to stop me removing them.
US Turn 5. Finally I managed to drag some more infantry onto the table as 1/2 of one of my platoons arrive. My tanks take a morale test and one can't move. And when I roll for motivation I Can't motivate it sufficiently to get a shot of. The return fire from both Stugs either misses or fails to penetrate the armour (I got luck again). My other Sherman moves forward to get into a shooting position. It gets hit my Stug opportunity fire and takes major damage. (It can't move and needs to pass a check before it can fire again. Which it fails to do for the last few turns of the game. I sacrifice a mortar stand to create a command stand. 1 less motivation, but n o other real option. Again I roll high on the countdown and knowing that we only have 2 maybe 3 turns left end my turn.
German turn 6. The German mortar continues to plague me, the Stugs fail to motivate sufficiently to take out the Sherman. They manage one shot between them which missed the damaged tank. The end game feeling is setting in.
US Turn 6. I bring on the rag tag last dregs of platoon no2. ($ stands from a possible 10. But I know If I don't get them on this time they won't have any time to do anything when they do arrive. I get my Mortar to drop smoke in front of the German mortar to block line of sight, with luck it should stop him firing next turn. My infantry move up including my bazooka team into the prepared defences that they support platoon have been defending. This means that it ill threaten at least one of the stugs next turn but does not have sufficient motivation to get a shot of this turn. But it all put pressure on Grahams forces. My one functioning tank is not sufficiently motivated to either move or fire so I end my turn.
The countdown is so low a 5 or 6 will end the game. I roll a six.
 
Conclusion. Luck was really on my side in this game. Seriously it was the luckiest game I have had for about 3 years. I did make some mistakes and should have played he pre-game less flamboyantly. But generally I managed to do roughly the right thing at the right time, which is very unlike me! The real downside is that we did not get to see how the US weapons (Garand and BAR) functioned in a game setting. However, as I told Graham, allowing me to win has galvanised me into wanting to get another force for the PBI. And he has beaten me 2 out of three times.
 
That's a long AAR for me. Hope you found something of interest in it. I shall post again on Wednesday all the best Clint.


Monday, 21 May 2012

Club Game- It all went horribly wrong

The club had three games going on Sunday, 4 of us playing "Infinity". A game we had tried before, but  had never fully got to grips with. So Ian and Relfie on one side and me and Kev on the other. I can't tell you what forces we used but only 5 figures each. I had 3 with "Combi rifles" one HMG and a shotgun. The top pic is my starting position. We started playing the game after a couple of turns realised we were playing it wrong and re set the game and started again. We all had a quick "shuffle" of figures in our deployment zone which allowed me to move the guy with a shot gun and the HMG in to better positions. I don't really want to talk about how badly me and Kev got beaten.... but we did. BADLY. All our figures wiped out with Ian and Relfie retaining the majority of their troops intact. We were out played, no excuses they made better use of the terrain and punished us if we tried to close with them. The second pic is Ians troops. Relfie played a blinder he kept me pinned and merged with every bit of cover to stay out of my lines of fire, Then when he got the chance popped out into the open and picked my guys off. I had harassing fire from Ian, but generally Ian was enjoying picking of poor Kev. The third Pic shows my growing casualties, 3 dead and only 2 remaining. I tried to move the shot gun up as it only has a range of 16 inches, well out ranged by everything else that could fire 48 inches or more. He nearly made it to cover but Ian managed enfilade fire as he tried to dodge across a very narrow strip of open ground. With just 2 men left Relfie brought one man forward in a John Wayne type heroic action. I am not blaming the dice (for a change) It was a bold move and it paid off and my last two guy soon perished .
The Fourth pic shows Kevs plight. his HMG was taken out quite early in the game, and as he tried to recover the momentum his chaps were butchered by Ian.

I'll not dwell on the gory details any longer. It was fun and I did enjoy it. But how did I find the rules? Well the game was fluid and easy to understand (having not read the rules) I knew what to do with the mechanics from about 1/2 way through the game. We did have to stop and look a lot of things up, hence the restart. I think if we'd set up a proper scenario we might have gotten a better game. Generally speaking as a science fiction set of rules I would put them somewhere between Stargrunt and 40k. Definitely a step up from 40k but to me not as good as Stargrunt. Stargrunt are an old set of rules now, but they work and work well.


 I managed to get a couple of shots at one of the other games, Tims "Good dusting" Sudan game in 15 mm. I won't say anything about it other than I was told the British lost. This is a work in progress I believe as Tim alters the "good dusting" rules to better suit our club.

Our club meeting on 3rd June is now cancelled, so we won't get another chance to tweak the Afghanistan game before Broadside. A Blow, but I remain confident the we shall overcome this setback without too much difficulty as I don't expect games at shows to be that competitive if played as a demonstration.

I estimate that I have less than 30 hours work to finish the Afghanistan game, and three weeks to do it. Which has taken the pressure off as I feel confident I shall complete it. This in my mind was the cut off date to abandon it and do WW1 Zombies if it was not going well. I am at the stage where I think pushing on is easier than hastily re-vamping an old game.

That's todays Post. I'll Blog again on Wednesday. All the Best Clint.