Showing posts with label WIP. Show all posts

Friday, 19 April 2019

Pulp Zepplin (1)

Additional Stretch goals
I had a sleepless night last night. (Not though choice I hasten to add!) As such I did some thinking. (Yes it  did hurt and I am sick of listening to the worlds smallest violin before you ask!) Anyway Long story short. I had an email from Karl at Crooked Dice to let me know that my Kickstarter should be ready to ship in a week or 2. As all the stretch goals are now finished and delivered to his home.
Starting Point

Anyway as I wanted to build a "PULP" board any way I decided to start. And what is more Pulp than an Airship!?  What a Zeppelin? Who in their right mind build a Zeppelin? The answer is NO ONE! But I thought it was worth a try anyway! I decided it would not be all that large, So swigging down the Pepsi I figured 2 2 litre bottles would make a good enough "hull" (I am sure that HULL is the wrong word but until I think of it HULL will do!)


 Needed a nose of some description. So I simply cut a pimg pong ball in half! I am sure there is a better option but I just went with what I had! As with the hull I am sure there is a MUCH better option but I could not wait for that. I NEEDED to crack on!


So using some UHU general addehisive I stuck 2 Pepsi bottles together.  At this stage I have no idea if it will work but am hopeful! It is now about 3 foot long. Judging that to be sufficient I stopped there. At this stage it is all pretty rough but with scissors glue a scalpel and a saw I am not overwhelmed! (That comes tomorrow!).

This afternoon allowing PLENTY of time to dry I shall give it a skin. I ran to the local store (A tescos as it happens) and bought some cheap Kitchen towel. So I will detail my endevours later on maybe Sunday.

Now while I wait for this afternoon to arrive and me to get a little more spare time I have some questions about Zeppelins. I promise not hard ones.

Firstly the engines and bomb rack will be external to the gondola! But what else would you like to see in the gondola.  I shall put a cockpit and Matt has suggested some machineguns. But what else is needed bearing in mind it shall be quite small? Please add serious ideas to the comments and I will see what I can manage!

COLD WAR WARGAMING.
As mentioned last time I plan some cold war wargaming. With a bit of tidying up I have a modular desert board. So it makes sense to me to work in a middle east setting. I shall say no more until I get the basics done. But remember you heard it here first! Or forget all about it if you choose.

Wednesday, 20 February 2019

WIP

Figure ONLY shown for scale.
I dislike Work in Progress blog posts. So I tend to not do them. None the less here is what's happening... At least as far as I am going to show.

Yes I have been working on my "Dieselpunk" game idea. The rules are started and this is my first vehicle. STARTED.

I have loads to do. So far as far as I can see no one make any rules. If you know better please feel free to let me know. there are several makes of figure which can be used but NOTHING as far as I can see directly aimed at this era. THat is not a problem any figure that would fit Spanish Civil war or VBCW or 1920's Gangster is appropriate.

On the right is the START (And only the start) of a vehicle for this period. I started wit a matchbox model of "yesteryear". I have several more to do and yes before you ask vehicle rules shall be in the rules I am writing.


 I have mentioned an idea to Dave Stone (WTW  . LINK ) so the first step in that direction has already been taken. I HASTEN to add it is only a 1st step. Nothing more.

I plan/hope to have a show game done by September, fingers crossed. I know very many of you will have no interest in this project.

Until I have something else to share I shall just shut my big mouth!
All the best Clint


Thursday, 28 May 2015

Re Landscaping my Moon Boards. (1)

Firstly let me get the book keeping out of the way. I have had to change the play by blog game back to a Napoleonic naval engagement as opposed to WW1 Dog fight. The planes at 1/300th scale were just too fiddly for me. So expect an update about that soon.

OKAY now on to what I have been doing. I was impressed by the response that the UFO project elicited so impressed that I have started to adapt my moon scape boards. I had too many craters on the boards I had made about 5-6 years ago. I have already done a step by step walk through on how to make them on the blog, when I was asked to make some for Ainsty Castings

So using a trusty hammer and wood chisel (long since blunt and now really in need of sharpening!) You can see from the first 2 photos one finished board and one that I have savaged! While the third photo shows some destruction of the second board.  All in all I removed about 1/2 the craters from each board which gives some open flat(ish) areas for movement and possibly for the inclusion of a moon base. (Very long term plan do not even suggest it at this stage or someone will want to see one next week).


The removal of the craters did take a while, as they were well stuck down. But Finally I did get the two boards to the correct crater density to open area ratio. (At least in my mind). A lot of the time was me thinking "Shall I get rid of that one or that one, or maybe those two!" But I finally got there and in the photos you can see the MDF board beneath. I kept most of the bigger craters including the one 17 inches across. As it really is easier to put things in them, figures vehicles, dice etc!and it breaks up the uniformity of the boards.

Eventually I was content, and even did the happy dance. As most of us will know the joy of using a hammer! It was not all easy going several times I removed one crater and another came with it OR  I damaged a crater that was in close proximity I am sure you get the idea. But for once I did not blame my self. The wonderful thing about the moon is that I have no idea where the craters are or should be and so as long as it looks right it is right.


 Repairs were the next stage. As you can see from the photo opposite . So with a trusty roll of masking tape I patched any damaged craters. You can clearly see the system I used overlapping strips of tape to get the slopes of each crater. I know it looks rough, but trust me if done methodically and consistently the technique works. One of the reasons it works is that I do not have people continually poking it to see what it's made of, if you want to know just ask it is easier all round than prodding and poking.


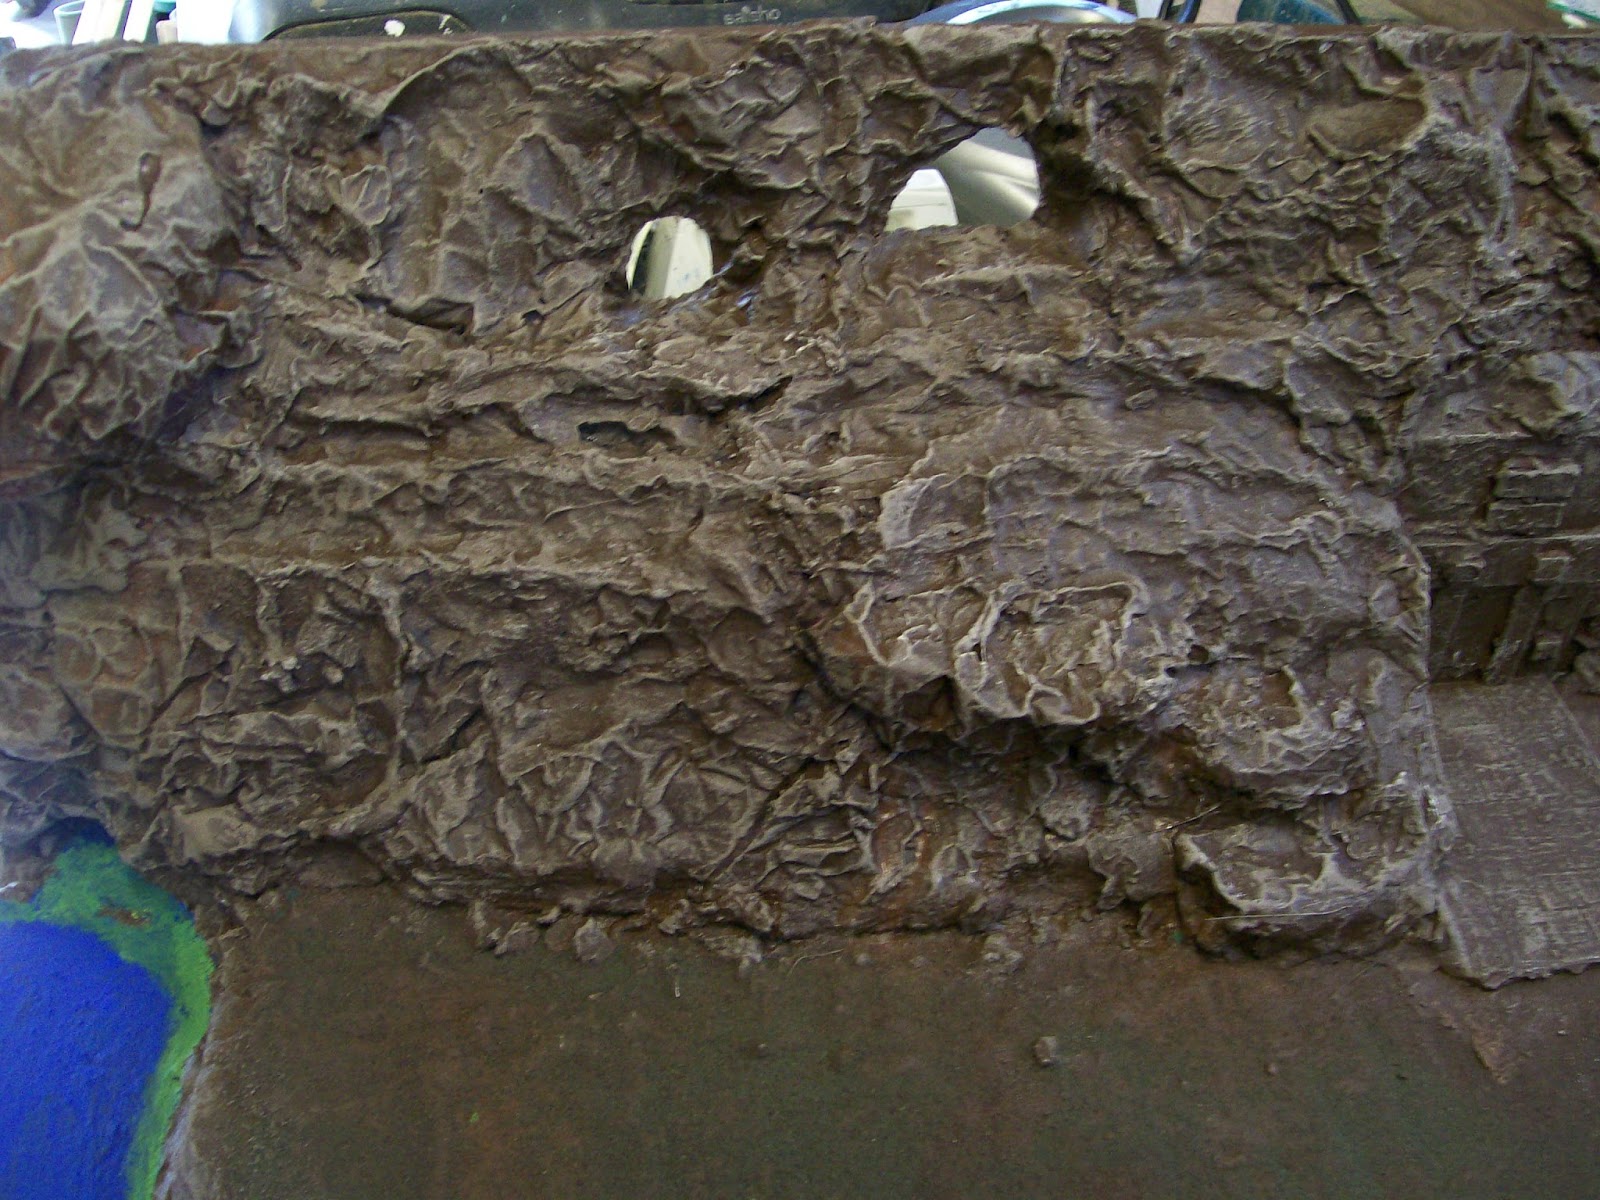
The next photo shows the next step. Having mixed up some paint and white wood glue (PVA (Resin W if we are being technical)). At this stage colour was not an issue as I know it will have several more coats to get the right texture and rigidity. So yes for a very short time it was a green colour. But we are talking minutes and nor hours as before it could dry I sprinkled the areas with building sand (The cheapest I can get). I applied a thick layer to cover as much as possible and not to leave any gaps. I continued the process on any other areas that needed patching. Lots of fun and lots of mess so if you ever try this method do not do it in the house, or you will get nagged and with good reason!

Giving  about 40 minutes tor the paint and glue to dry I simply poured the sand of the board swept it up and put it back in the bucket ready for the next coating.


 The process was repeated 3 times using plenty of sand, plenty of glue and plenty of paint. In fact so much paint I have to get some more today when I am out. As you can see in the photos you do get sand everywhere and paint/glue a lot of places too, so I do all this stuff in the garage well away from anyone who might complain. I also have a tidy up afterwards as well. Thrust me it's best to do so!

After a while the boards start to take on the right texture. And by using 3-4 coats of paint/glue/sand will get tough enough to play on. No they will not stand up to being run over in a car but are totally suitable to play on.

With waiting times it will take several hours so perhaps it is best left overnight, just to make sure it is dry. Yesterday for me though was a nice hot sunny day and things were drying very quickly in fact several times the paint and glue was dry before the sand was sprinkled on! In Which case it was re applied in smaller areas and a patchwork was built up. But while it was hot and sunny I pressed on with the task.


 In a couple of areas the previous texture was lifting and was creating very small ridges. Rather than fight against it I went with it. Only about 3 mm and rather than worry about it I just applied more paint glue and sane and rejoiced in the slightly uneven texture knowing that when all was dry they would add some low level relief to the boards.

When I was OK with how it looked, I used up the last of my black and dark brown paint and sealed all the areas that had been transformed. Photo not shown. And that is where I have left it over night already to start today when I get some more paint and glue. If it has dried how I hope I will just be on the colouring up today and the boards will be finished by the new week. As is more likely they will require another coat of paint glue and sand they should be ready by the end of next week. So I will show them when I get to stat stage. There may also be some half painted photos as well just as WIP.

That's it for today. Thanks awfully for the enthusiasm of the UFO project it has pushed me onwards over the last few days. And I have now reached a stage I need to restock on modelling supplies before I start again.

Take care, have fun and tune in soon for another update, or maybe something different.
Cheers from Clint

(Post Script) I have a new Avatar as the first time in my life someone guessed  who I was named after! It is no secret I was named after Clint Walker but no one has ever guessed before without being told or at least very strong clues being given!


Tuesday, 14 April 2015

So it begins Part 1

Well the response from people wanting to play has lifted my spirits somewhat as I was thinking I might have selected a set of rules that were just a tad too challenging. Time (and hair loss) will tell if this turns out to be the case.

Firstly a big thank you to those who have responded a game is only as good as it's players. So cheers guys. Secondly I am still waiting to hear from at least 3 other players who played last year and therefore I have reserved places for them just in case. So the list may be just about complete but I am happy to take reserve places if anyone drops out.

Right on with what I have done! Because of the good weather I am willing to work in the shed. That is not something I choose to do in the winter, it's just too cold! My Jigsaw was indeed "Man enough" to cut the 19mm chipboard it was a struggle and did leave me sweating and swearing, but by taking it slow and clamping the board I was able to cut it quite accurately. Yes I could have used a circular saw but as that has teeth missing I though safety should come first and until I get a brand new blade for it I will not be using it.

I have put the first colours on as well. Using a mixture of Acrylic, poster and emulsion paints I have painted both boards green. Then I found a beige "tester" pot and painted that over the top and blended them together. The result a patchy surface to work from. I like the look of the boards now, but it is only the first step. The paint is on thick enough so none of the board shows through but It also looks like it does because the green is quite weak in tone and the beige is very similar to the boards starting colour. But this is just a base colour as the topographical landscape needs to be added so that you guys are flying over something and not just blank space.

I will not be adding hills in a three dimensional sense so this time out you will not need to climb to get over bumps in the game. Nor will most other features like roads, trenches, streams, towns and shell holes .

That's it for today, just a quick update so you know you are not forgotten. Like I said there are still reserve places in the game but for now the list is closed unless you played last year and have still to get back to me. Fran, Curt, Seb,  and the mysterious Aussie that I have heard through the grape vine wants to play.

Cheers Guys and may the green side not come up too fast!

Take care Clint

Thursday, 16 October 2014

Mo without the jo!

In other words the painting Mojo is coming back. Yes I know it's very dangerous. Very dangerous indeed. So I have started work on a Grubby Tanks LRDG Chevrolet. Code (LRDG 04) if you really want to look it up. And that tells you one of the vehicles I bought at SELWG show.

As you can see it comprises 4 wheels a driver, a gunner with Vickers K machine gun and a gunner with a 0.5 Browning. In addition it comes with 2 extra Vickers K machine guns. There are no instructions but I could work out where most things went.


I did decide that the extra Vickers were superfluous to my particular needs  and that a 0.5 Browning would be sufficient. So I filled any of the small air bubbles and added green-stuff to make the rear passenger more enclosed. The hardest part was fixing the radiator but even that was not insurmountable and once I got better at using the green stuff piece of cake.


Then a quick coat of grey primer. This gives me a good place to start painting.  Some of the base colours are on now. But it's going to take a while as there really is a LOT of stowage that you don't notice until you start painting and then you have to work out exactly what it is that you are painting. (Boxes, Tarpaulins, blankets, wheels, packs helmets etc.) So I am sorting out the bits and bobs and slowly getting it all covered in paint. I's going to take some time so expect to see it finished next week some-time.

That's my update for today as I have a new set of rules I am working through. Thanks for looking and with luck something finished soon.

Take care and get the brushes wet. All the best Clint

Thursday, 2 January 2014

WIP (2) Curt's Challenge.

 As my Fuzzy Wuzzy's have not been on Curt's blog http://analogue-hobbies.blogspot.co.uk/ for very long it would be wrong to show them just yet. feel free to click the link above and check them out, or wait a couple of days and I'll put them on here.

In the mean time here are a couple of work in progress shots to let you know what's coming up next. As ever I will work on what takes my fancy when I sit at the painting desk, so these may come in any order.

  • 10mm Madist Camel riders
  • 10mm Mounted Samurai with bows
  • 28mm Mexican Bandits (Villains)
  • 28mm Eotd Grave robbers (Villains)

It has struck me that in a wild west filmic setting Mexicans get a rough deal. They are either the victims or the Villains. With the exception of Zorro and Manolito from the High Chaparral there have been very few Mexican characters shown in a good light. So Mexican Bandits may well be the way I go for the Villain Bonus round on The Analogue Painting Challenge. Due on Sunday.

The alternative is of course to go for Burke and Hare the infamous Grave robbers, but I may save those for a later round when "Dead" are needed and they could make a nice little Vignette. Or maybe finish the last few Wild West Zombies!

Coming soon I will have to start my Deadzone figures as there will be a game soon and as yet I have only assembled one of the blighters, let alone wave a paintbrush anywhere near him! I am slipping behind. I also want to continue with the 10mm frenzy and get my Ansar and last few Samurai finished off.

So until next update. Cheers Guys and I hope this year is treating you as well as you deserve so far. All the best Clint.

Friday, 20 December 2013

Started and first points.

 Well I am off the mark. As many of you will already know I have put my first submission in to Curt at analogue-hobbies and gained 48 points. 1 point for each of the 48 Ashigaru (Light feet). There are a total of 12 stands each of four figures in two different uniforms to represent two different armies. Regular reads will no doubt remember me starting these armies and yes I still have a lot more of these troops to paint. I have now filled one A4 box file and am starting to put figures in a second one. I estimate that I have about another 1/2 a box file of unpainted before I need to purchase any more. But they are on my list so I think a further purchase will be desirable

. As mentioned on Curts Challenge I use a very simple technique to paint 10mm figures. After a white undercoat I block in the base colours, then apply a heavy dark was and finally highlight the blocked colours to lift them and make them more vibrant. This Painting style is quick and effective, but will not win a painting competition. It does pass the 2 foot rule though and looks pretty good on the wargames table which is all you really want with 10mm figures.
 
 I am very happy to have made my first submission to the challenge and gotten off of the ZERO start level. I can now start to chip away at my 600 point total.

Work in progress for the challenge has me painting several things at once. Currently I am painting the figure for Curt's entry fee. Having said that I am about to start painting an alternative and make the final decision when they are both finished. The one I don't use will be given to the first of the 600 club to reach that lofty goal. Obviously should I reach the summit first it will go into my collection. (Very small chance of that).

I was going to paint some wild west Cancan dancers for the "Non Combatants" bonus round, but I am sorry to say I have changed my mind and am now going to do some Crooked Dice Astronoughts as they are unarmed apart from an offensive clipboard (the pen is mightier than the sword) and some device which bears a passing resemblance to a sonic screwdriver. I also have a donkey about to be primed which I rediscovered last night. Everyone needs a pack mule and as such it is a very versatile figure. Additionally I am about to prep some more 10mm Samurai (probably peasant archers, but not sure yet, Maybe more Ashigaru I will not know until I get to my work bench.)

I will also start painting some figures for the Arab Revolt. So as you can see there is a lot in progress, but not so much to show at the moment.

Finally before I go for today I am feeling like creating a colonial army (well 2 as they will need an opponent), so I am very open to suggestions as to what conflict to recreate. I will not be looking for a skirmish game but a big battle game, although not the Sudan. The reason not the Sudan is simply because another club member has already covered that quite extensively.

Anyway thanks for reading, I hope you found something of interest. I hope to post again on Sunday with any luck, so I had best get the brushes busy today. All the best Clint.


Tuesday, 6 August 2013

TAR7AN Board update 5

 Ok not making any excuses, but it's "Summer Holiday" time so having to look after my nephew means I don't get as much hobby time as usual. Because of that I have not got any figures painted. So here's where I am on the board.

As you can see the stepping stones are now in place. Some tidying up to do but overall not too bad.

I have STARTED to paint the river. Only started mind so not the finished shades, but It should I hope, give a rough indication of where it is heading. at least 2 more shades of different blue and another green before I look towards the Varnish.

I have finished dry brushing the cliff. This takes it from a very plastic kids toy feel into a slightly more credible look. Once stains and some foliage is added it should start looking more realistic. At least that is the hope. I don't mind it looking a little cartoony but I don't want bit to look too ropey!


The temple entrance was treated as roughly as the cliff and yet still gives a passable result. I have yet to black in the doorway but even so you can see that it should work.


I would like to say I have more to share, but James (the nephew) has taken and will continue to take up time and effort to entertain. Which is not in any way a complaint, but is perhaps some part of an explanation.

I shall try to get some figures finished for Thursday. Basing and a lot of touching up to do on this next batch..... and due to my self imposed "Figure Fast" you will see they are not from current front runner projects but from something started a couple of years back!

That's it hurried out for today. Hope to see you Thursday. So until then take care have fun and enjoy the sun. All the best Clint.

Sunday, 4 August 2013

Paint it BROWN!!!!!

Yes I am aware that I have over painted the whole board with a brown paint. It was a deliberate act as some cement was accidently sprinkled (not by me but what can you do) on it and was refusing to shift easily. I like to think of it as a positive step though and not a negative. Now that it is all painted with brown acrylic paint (the type you can get at "The Works" 2 for £5) the board is sealed and should any further mishaps take place should be easier to deal with.  Although it is patchy on the grass, this will get a coat or two of green so not to worry at this stage.

So having gotten past the fact that I am re-painting what has changed. Well in the second picture you can clearly see the stepping stones which cross the water edge and link the board to the river. Each one is large enough to carry a 28mm figure.These were simple pieces of slate that some people use in there gardens between flowers to discourage weeds. I managed to pick them up from the gutter following that big storm we had last week having been washed out of their respective front gardens. Waste not want not! I looked high and low but could not find any Araldite so have settled for Evostick Impact adhesive to fix them in place. Let's be blunt once the varnish is around them they should not move, not even a smidgen!.

It is a shame that the layers of paint have started to texture the bottom of the river bed, but I feel confident that pouring the varnish and not brushing it will hide those very nicely. As pouring the Varnish was always the plan this is of little real consequence. In other words I'll BODGE it!

The last two pictures show the subterranean temple entrance. I have kept it crude and unsophisticated simply to reflect the primitive nature that I wish this pulp set of villains to portray. It is not meant in any way to reflect the craftsmanship of other cultures around the world, but merely a piece of set dressing. Some of the plaster I was using has gotten onto the face of the temple, but I can live with that. and I don't think it detracts too much from the idea. Or maybe they need a few work slaves to chisel this off and get a better temple. the last slaves having died and been eaten. Who know!

So at this stage I feel that all the major construction has been completed. Which means that I should be able to start painting it up to a finished level hopefully by the end of the week. I will change the doorways to the huts, but not the roofs again that is something I will try to get done this week as well. So by Next Saturday I can show how the board has progressed.

I hope to do my next blog post on Tuesday. So until then take care and enjoy what's left of the weekend. Best wishes Clint.


Tuesday, 16 April 2013

Town Planning

I woke this morning to the news of the bombs in Boston last night. There are no words I can use to try to explain why someone would choose to do such a thing. All I can say is that my thoughts prayers and best wishes are with the victims. As I am sure all ours are.

Before I start the town planning I had to do a couple of running repairs on the boards. Nothing major, just a bit more glue and clamped to hold it in place. Just letting you know that sometimes it does not go to plan.  Mostly it does, but just sometimes it needs to be given a little more encouragement than normal!

I have finally started the little fishing village I want on the BBIB boards for Broadside. Given the scale (1/2400th) the buildings would be really quite small. Modern buildings such as sky scrapers, shopping centres and the like would be much larger. Temples and Palaces of any period would also be larger, but as the fishing village would not need any palaces or warehouses or other buildings of that size. This being the case I went for the simplest solution. That solution was to cut triangular section plastic rod into random short lengths to represent the roofs of the cottages. If I had different triangular sections I would have used them, but as I did not and as the fishing village is not a very major part of the boards I am not concerned.

The second stage has been to add thicknesses of card (Grey board) underneath the roofs to turn them into buildings. As my Grey board is 3mm thick and quite the thickest card I currently own they have started to look a little uniform. I am sure I can overcome that by positioning and applying colour. As soon as the rain stops here I will spray them ready for painting.

As you can see to the right creating towns in this scale is not particularly challenging. This was achieved simply as I put them down to dry. Once roads/tracks and possibly gardens have been indicated I suspect it will start to look more torn like. If the weather holds I should get some more done in the next couple of days.

That's todays very brief work in progress update for the BBIB boards. Thanks for reading and I'll do my pre Salute post on Friday. Maybe my shopping list, or items I want to look at.

So until Thursday, take care and be kind to yourselves! All the best Clint.