Friday 1 July 2016

Crystals

Not much painted today, Just these two bits of Sci Fi scenery based.  Just 2 coloured resin Crystals. They are by a small company called "Wargames Terrain Workshop" (LINK ) The joy of this company is that they can and do make the crystals in a variety of colours. Blue, Green, Purple, Yellow red and  Opaque Resin . When I bought these at a show they had literally just sold all the blue to the guy in front of me so I went for the purple instead.  The bases are the same resin as well but I just went for a simple desert yellow with some static grass. Nothing fancy or clever but better than leaving the bases purple!

These are the small Crystals on the left and the medium crystals on the right.  From both the front and the back.  In retrospect I should have put a figure in so you can judge the scale. But the small one is about 1 1/2 inches across and 1 1/2 Inches tall.  So plenty big enough for space marines to hide behind. Having said space marines I will probably go down a scale and use 15mm troops.

Talking of 15mm troops I will not be posting for a few days as I am about to start a new force and am prepping them at the moment.

All the best from a dull overcast and now raining Kent!

Cheers Clint

Wednesday 29 June 2016

Not a power loader finished!

As mentioned in my previous post this is not a power-loader from Aliens. But It does have some resemblances.
Enough resemblances for me to want to use it as both a 28 (or 25) mm miniature and also a 15mm miniature. Hold yor horses there is a scale comparison at the end I promise!

Obviously I went for the fork lift arm version although GZG do make a couple of other versions. But the fork lift seemed a better fit for any 28mm shenanigans that I may have tucked away in the back of my mind.  (And there are some).

I painted direction indicators on both the front and the back of the legs and hazard lights as well. The vehicle is supposed to be civilian so I had no issue doing that to make it look road legal!

Likewise I went for yellow colouring as most Industrial building plant is painted yellow and I though it might make it look a little more civilian and besides the power loader in Aliens is also yellow! I went for a pale yellow and dirtied up the feet and the legs and also the engine on the back, just to make it more "Lived in" and not straight off of the factory production line.

Overall I am happy with the result and will now move onto something else. But for now I am just basking in the joy o getting it finished as it did take longer to paint than I first though it would.


The model, a foundry 28mm street violence figure
and a battlefront 15mm Modern Russian,
All just to show size comparison.

As you can see despite the model being designed and built for 15mm there is enough room for a 28mm to sit behind the  roll cage and operate the machine. So totally usable in a variety of scales and I hope to use it in 2 scales at least. But probably NOT 1/300thscale SCI FI.... but you never know!

Thank you for looking today and I hope to do some more 15mm sci fi this week as I have another force to get together. After that perhaps back to 28mm figures for Matt.


Cheers Guys, all the best Clint.


Monday 27 June 2016

Not a Power Loader from ALIENS.

While at the club yesterday |I played a board game so no Photos of that.

So here instead is a model I purchased at Salute 2015 from GZG (John Tuffley) It is Mec -02 (Link to GZG shop ) and costs £12 plus postage.  It is the closest thing I could find to an Aliens Power loader. Now I did put of building it for over a year as there were no instructions AND I had NO immediate use for it. I currently do have a use for it though so it was about time I got it started.

So Today It is a how to assemble a suitable model for a power loader. Simply because I had to figure it all out myself and I can imagine someone getting stuck.
All the pieces cam in 2 resealable bags
There are NO instructions
 
Stage 1 is to lay all the pieces out and make sure they are all there.
There was no list of contents
 

Keeping the arm pieces that came in 1 of the bags separate
I layed out the other pieces.
I started with the torso and worked
out from there

Each foot came in 3 pieces
And were assembled as above.

Once a foot is built,then build a leg.
One thing to remember is that the legs
are not the same, there is a left and right.
Very minor diference but make sure
the Bulge goes on the outside at the "ANKLE!"
 

Then attache the hip.
In the Photo you can see the bulge on the right of the leg.
Having 2 Bulges together at the ankles would impede movement
on a finished walker and make the model
more awkward.


The Torso comes in 3 pieces,
The centre Torso the Front (I went for the open cage effectand a rear section
with an engine. You have a choice of fronts and a choice of backs

On one leg I arched the foot so as to give it a
slightly bent leg as if it was just about to take a step.

I then attached the Torso
And glued the upper arm to the shoulder joint

The fore arm was then glued to the upper arm and an elbow created.
Kindly note the "Forks" are not glued and are in fact upside down.
You want the flat surfaces to face each other.

Shoulders and upper arms attached to torso.
There is a lot of positions you can put them in so
find one you are happy with before applying any gule

The forks are now facing each other and both arms age glued together.
I deliberately placed the forks DIFFERENT distances apart as
I realised that if I made them the same but got it wrong people would notice.

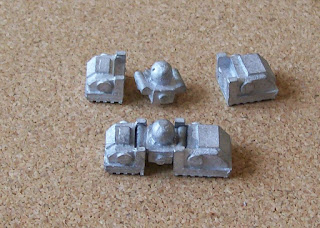
Two additions to place on the torso.
Holes are present (mine did need a little cleaning out) but the
Order you place them is up to you. Or even to place them at all.
 

Finished assembly from the front.

Finished assembly from the rear.

And also from the side.

At the end of the build I had 2 pieces left over.
1 is an alternative engine.
1 is an alternative cabin.
 

Overall it was an enjoyable build and it will go to paint in a few days. The difficulty comes from a lack of instructions but given time and patience you will overcome that and work out where everything goes. (I managed it after all). While the model is supposed to be 15mm wargames scale I intend to use it for 25mm (and maybe 28mm) so sometimes a change of scale will work just as well.

It is not an exact copy of the ICONIC Aliens Power Loader but for me is close enough.

Thanks for looking today and with luck I will start to splash some paint on this and have it ready soon.

All the best Clint