Friday 29 May 2015

Moon scape part (2)

Just going to get this one in today and then no more until Monday. Yep next blog post will be on Monday.

So starting with the top 3 photos we have the moon boards now sealed with PVA white wood glue (Resin W) mixed in with black and brown paint. This helps to cover up the sand colours before painting. I use a ratio of 3 parts paint to 1 part glue and 1-2 parts water. I am sorry I can't be precise on the water as I go by viscosity and that will vary with the make of paint and make of glue.

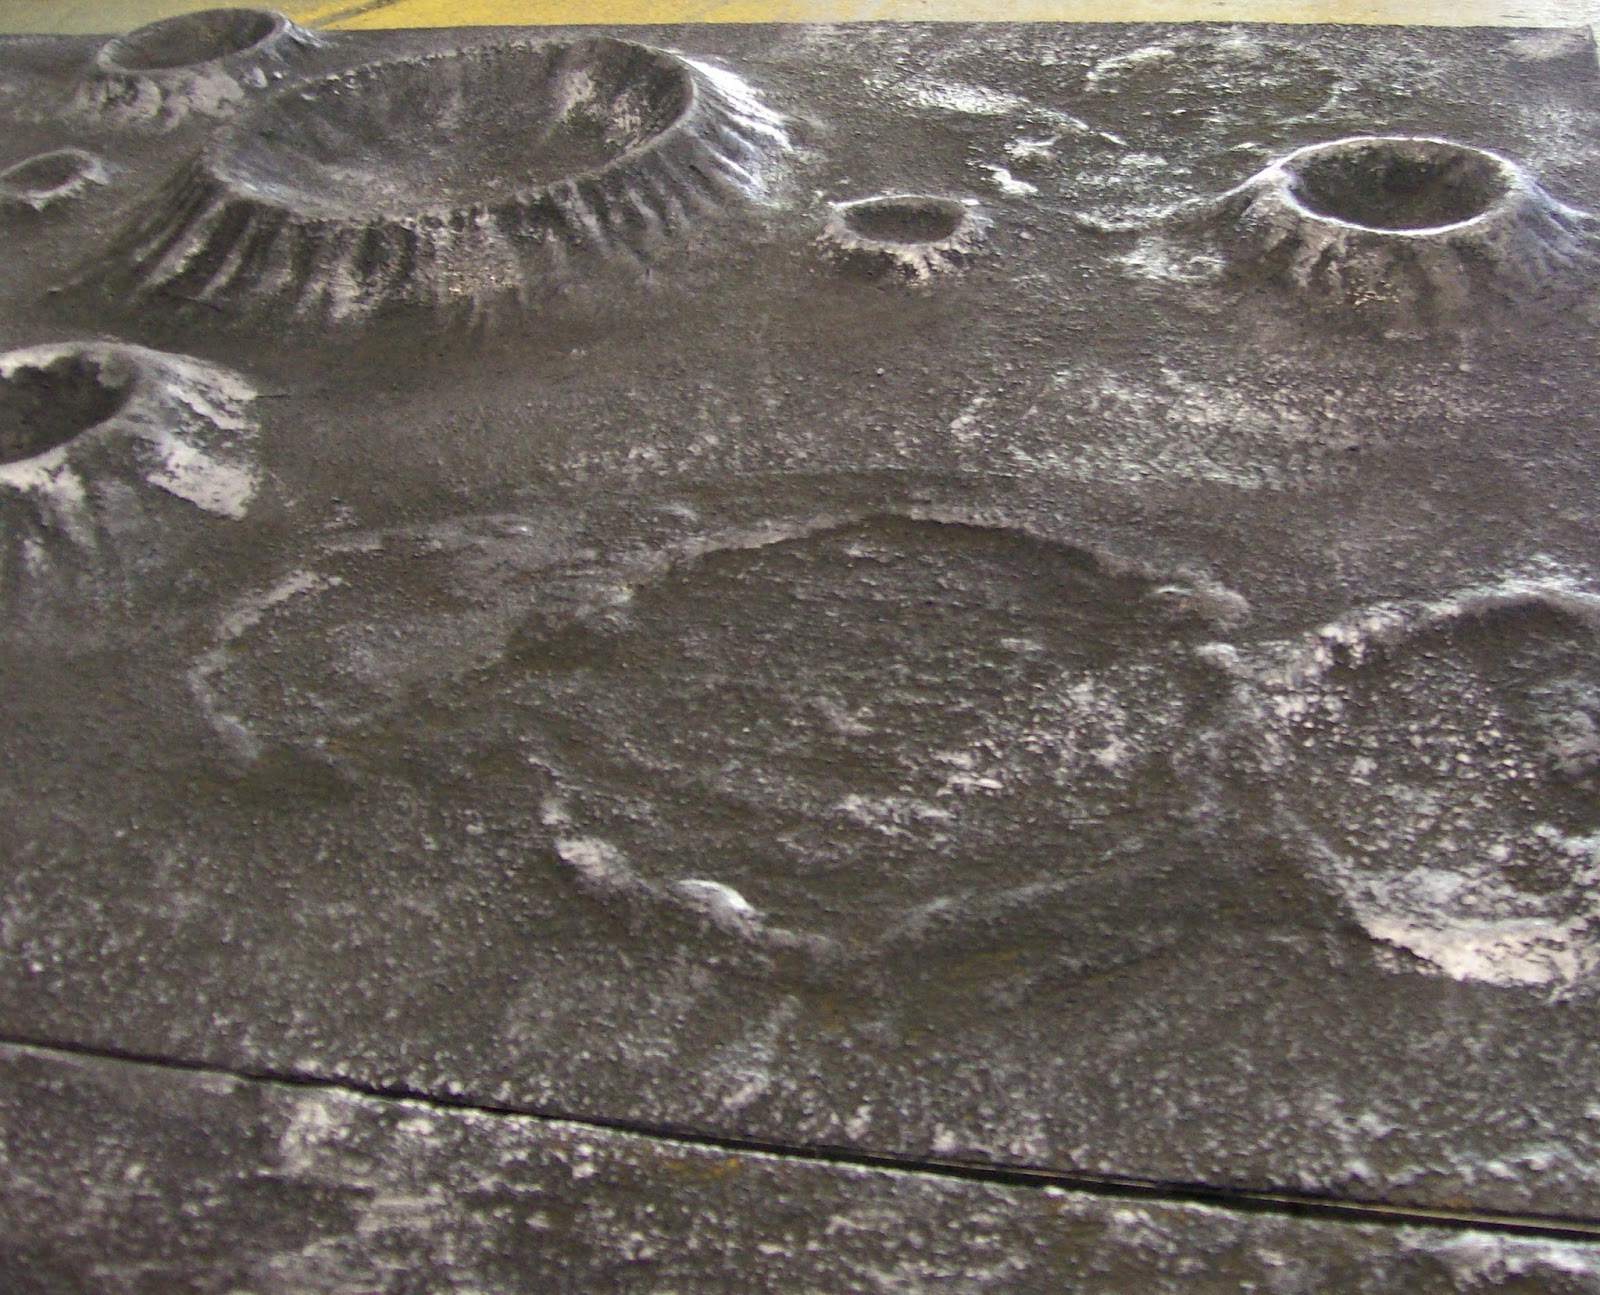
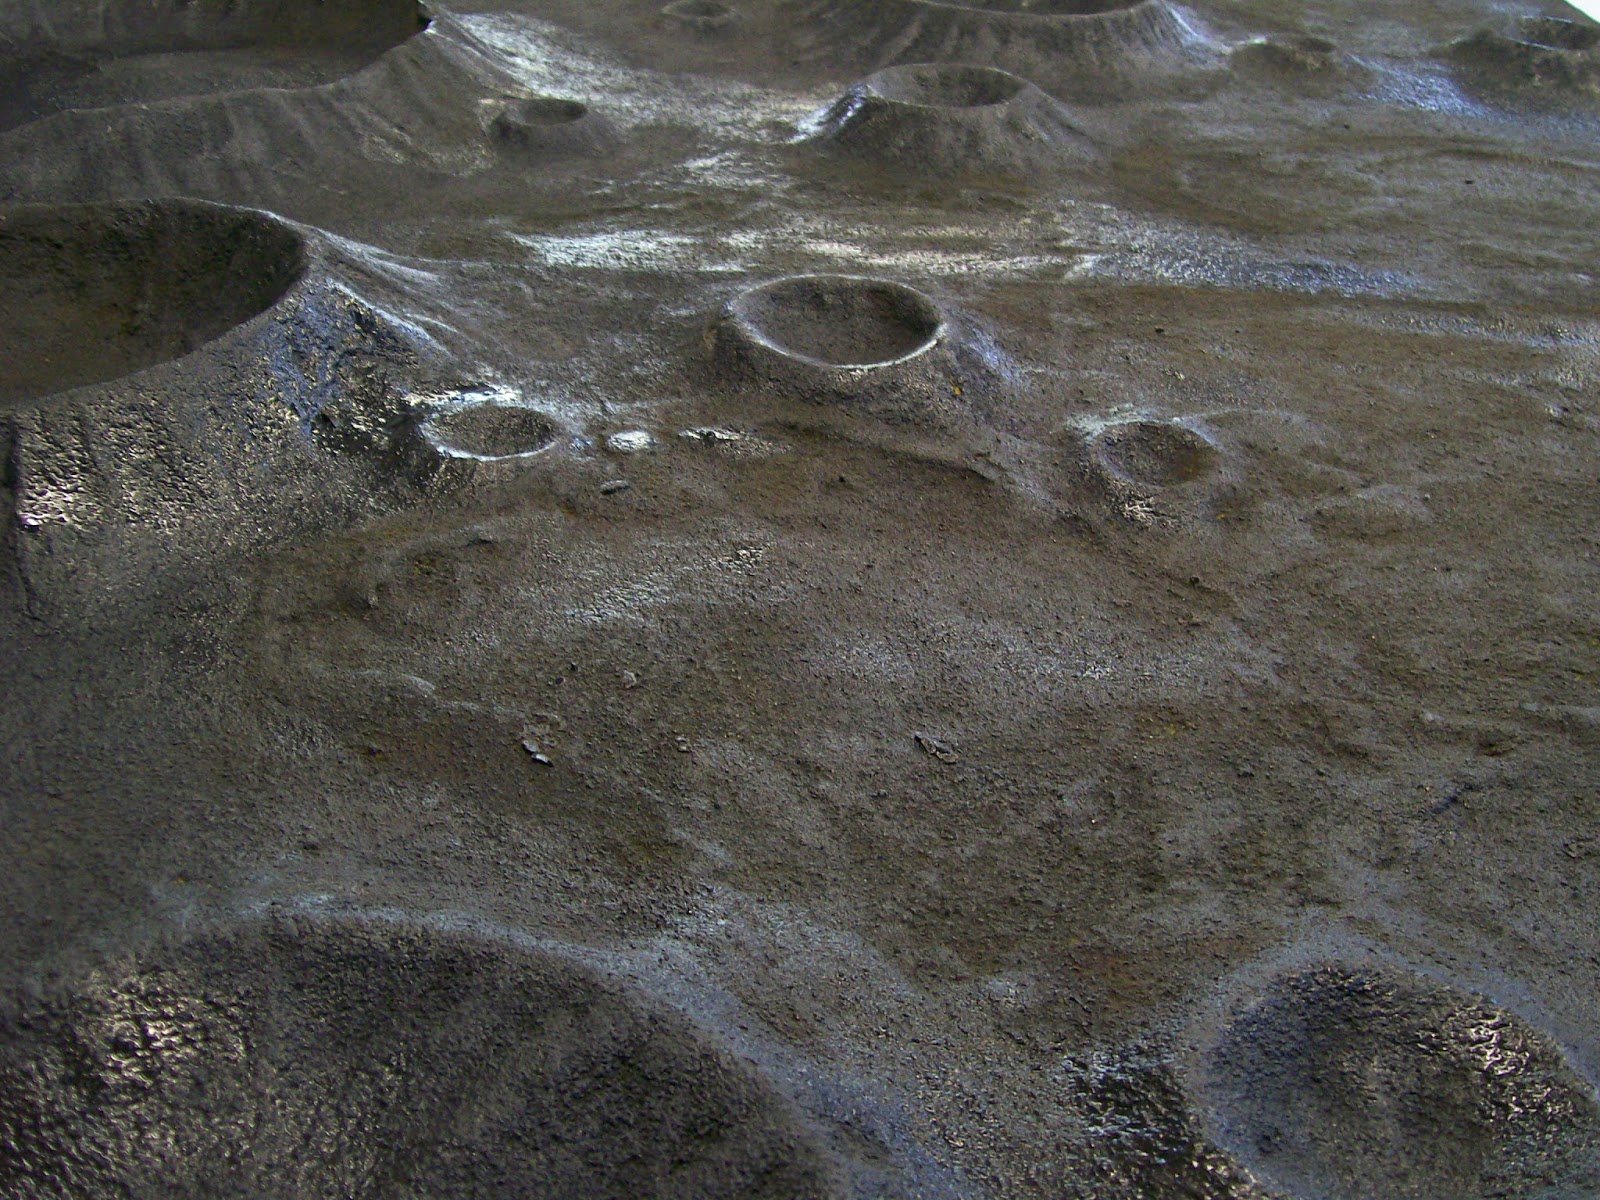
The most important thing is to make sure everything is coated and the boards are sealed as we go not want all the sand coming away or rubbing off. (Some does eventually I know but it can be minimised with sealing and gentle handling.  As you can see in the second photo the repair is no longer noticeable (bottom left corner of the large crater. You will also note a slight uneven ridge on the left where an old crater has been removed.  Now to my thinking this looks good and not at all bodged giving the boards a more natural feel. If anyone makes an issue of this I will simply say maybe a crater hit there eons ago. But no one will, well no one who has not read this and wants to be a smart arse!

The third Photo again shows some slight depression or ridge where a crater has been removed. And before much paint goes on I think it looks like a credible moon scape.

Painting is really quick. I really mean that. Both boards were painted in about 30 minutes total. I am not precious when it comes to colouring these boards as I just want to get it done to an acceptable level without the need to sweat and swear at the boards.So That's the plan for me. I use a mixture of Black and white Acrylic from the works (two tubes for £5) and that does the whole lot with about as much left to spare.

 Painting is all done with a 42 decorators brush from the 99p stores. There really is no need to use anything smaller or more expensive. The bigger brush covers everything very quickly and you don't mess about trying to get it to look perfect. You just get on with it, no fuss, no stress and no hassle.

I start dry brushing from a very dark grey and just keep adding white to the mix when ever I run out of paint. And needless to say the lighter tomes tend to be on the most prominent features. It may not be like that in real life, I don't know I have not been to the moon. But for me it looks right and I am happy with it and that's what counts as far as I am concerned. technically it may very well be different, but if it is I will never know. So without degrees in "astrophysics" or similar I am Okay with how it looks.

All in all this remodelling took about 5 hours from start to finish (Not including paint/glue drying time) so something most could do over a long weekend. It does take longer if you are starting from scratch but I was not.

I hope you like the look of the new boards and I hope/plan to get a game on them in the next 6 months if not sooner as my UFO project comes to life.

Thanks for looking today, have a good weekend and treat yourself as I am sure you deserve it. I shall have a beer tonight with my evening meal before you ask.

All the best Clint out!


Thursday 28 May 2015

Re Landscaping my Moon Boards. (1)

Firstly let me get the book keeping out of the way. I have had to change the play by blog game back to a Napoleonic naval engagement as opposed to WW1 Dog fight. The planes at 1/300th scale were just too fiddly for me. So expect an update about that soon.

OKAY now on to what I have been doing. I was impressed by the response that the UFO project elicited so impressed that I have started to adapt my moon scape boards. I had too many craters on the boards I had made about 5-6 years ago. I have already done a step by step walk through on how to make them on the blog, when I was asked to make some for Ainsty Castings

So using a trusty hammer and wood chisel (long since blunt and now really in need of sharpening!) You can see from the first 2 photos one finished board and one that I have savaged! While the third photo shows some destruction of the second board.  All in all I removed about 1/2 the craters from each board which gives some open flat(ish) areas for movement and possibly for the inclusion of a moon base. (Very long term plan do not even suggest it at this stage or someone will want to see one next week).


The removal of the craters did take a while, as they were well stuck down. But Finally I did get the two boards to the correct crater density to open area ratio. (At least in my mind). A lot of the time was me thinking "Shall I get rid of that one or that one, or maybe those two!" But I finally got there and in the photos you can see the MDF board beneath. I kept most of the bigger craters including the one 17 inches across. As it really is easier to put things in them, figures vehicles, dice etc!and it breaks up the uniformity of the boards.

Eventually I was content, and even did the happy dance. As most of us will know the joy of using a hammer! It was not all easy going several times I removed one crater and another came with it OR  I damaged a crater that was in close proximity I am sure you get the idea. But for once I did not blame my self. The wonderful thing about the moon is that I have no idea where the craters are or should be and so as long as it looks right it is right.


 Repairs were the next stage. As you can see from the photo opposite . So with a trusty roll of masking tape I patched any damaged craters. You can clearly see the system I used overlapping strips of tape to get the slopes of each crater. I know it looks rough, but trust me if done methodically and consistently the technique works. One of the reasons it works is that I do not have people continually poking it to see what it's made of, if you want to know just ask it is easier all round than prodding and poking.


The next photo shows the next step. Having mixed up some paint and white wood glue (PVA (Resin W if we are being technical)). At this stage colour was not an issue as I know it will have several more coats to get the right texture and rigidity. So yes for a very short time it was a green colour. But we are talking minutes and nor hours as before it could dry I sprinkled the areas with building sand (The cheapest I can get). I applied a thick layer to cover as much as possible and not to leave any gaps. I continued the process on any other areas that needed patching. Lots of fun and lots of mess so if you ever try this method do not do it in the house, or you will get nagged and with good reason!

Giving  about 40 minutes tor the paint and glue to dry I simply poured the sand of the board swept it up and put it back in the bucket ready for the next coating.


 The process was repeated 3 times using plenty of sand, plenty of glue and plenty of paint. In fact so much paint I have to get some more today when I am out. As you can see in the photos you do get sand everywhere and paint/glue a lot of places too, so I do all this stuff in the garage well away from anyone who might complain. I also have a tidy up afterwards as well. Thrust me it's best to do so!

After a while the boards start to take on the right texture. And by using 3-4 coats of paint/glue/sand will get tough enough to play on. No they will not stand up to being run over in a car but are totally suitable to play on.

With waiting times it will take several hours so perhaps it is best left overnight, just to make sure it is dry. Yesterday for me though was a nice hot sunny day and things were drying very quickly in fact several times the paint and glue was dry before the sand was sprinkled on! In Which case it was re applied in smaller areas and a patchwork was built up. But while it was hot and sunny I pressed on with the task.


 In a couple of areas the previous texture was lifting and was creating very small ridges. Rather than fight against it I went with it. Only about 3 mm and rather than worry about it I just applied more paint glue and sane and rejoiced in the slightly uneven texture knowing that when all was dry they would add some low level relief to the boards.

When I was OK with how it looked, I used up the last of my black and dark brown paint and sealed all the areas that had been transformed. Photo not shown. And that is where I have left it over night already to start today when I get some more paint and glue. If it has dried how I hope I will just be on the colouring up today and the boards will be finished by the new week. As is more likely they will require another coat of paint glue and sand they should be ready by the end of next week. So I will show them when I get to stat stage. There may also be some half painted photos as well just as WIP.

That's it for today. Thanks awfully for the enthusiasm of the UFO project it has pushed me onwards over the last few days. And I have now reached a stage I need to restock on modelling supplies before I start again.

Take care, have fun and tune in soon for another update, or maybe something different.
Cheers from Clint

(Post Script) I have a new Avatar as the first time in my life someone guessed  who I was named after! It is no secret I was named after Clint Walker but no one has ever guessed before without being told or at least very strong clues being given!


Tuesday 26 May 2015

UFO 7TV

I must be honest this idea only came to me at Salute this year. But now that I look back I was probably only going to end up here anyway.  Back when it first came out I was not a fan of the TV series "UFO" by Gerry Anderson much preferring other TV series like "Colditz" or even Captain Scarlet (and the Mysterons). But in the past few years it has grown on me. Without knowing it I first built a moonscape, well that is to say I knew I was building it and was enjoying it, but was never really aware why. I don't mean that in a "Close encounters of the third Kind" build a mountain, I am sure you get what I mean. I was building it as mostly I just wanted to. I even painted up a handful of astronauts but not really enough to do anything with telling myself that at the time there just was not enough astronauts figures to make the project viable as well as the fact that I could not find any suitable aliens in space suits. So the Project did not go anywhere after my initial burst. (That is just so me!)

Then a chance conversation with Tim at the wargames club where he mentioned the various "Dinky" diecast toys from the period. When I was a kid one of my best friends John had this toy. Not this actual one but this diecast model. Anyway I asked Tim what scale it was but he was unable to tell me. It was about 40 years ago so I could not remember. So I looked it up online and still could not find an answer so I looked for the cheapest I could get on eBay just to get an idea.

While I know I will never get an exact scale, looking at the seats inside the cabin I would say that it is about the right scale for a 28mm figure. From that realisation it quickly became apparent that a tabletop version of the now, "classic" UFO series was a strong possibility. I already had a moon scape (I will have to re-do some of it and remove about 1/2 the craters but still). I already have the Astronauts and the Aliens. (they were humanoid and wore space suits as well). I have a set of rules almost perfect for the series, and now I have a "Shado Mobile" diecast toy.


 So I have just about gotten everything I need. yes it will all need work to bring it to life, but I have all the basics.

Talking of the "Shado Mobile" considering the cheap eBay price, where the postage cost more than the product it is not in bad nick. Obviously it is missing tracks and also missing the rocket. But as you will never fire the rocket using the spring on the diecast model the missing rocket is the least of my worries. It will need a new coat of paint to hide all the chips and scratches but that is stock in trade for wargamers!

 A couple of the axles are also bent, but as I will mount it on a base and not "trundle" it across the floor as most kids wouldhaving bent axles and no tracks is a modelmakers bread and butter. For a start I could take the tracks from another model kit, or I could use an elastic band of the correct size and width or I could make them from plastic as they are now not going to need to move. So overall while I know I will sweat and swear at it and myself I am very happy and expect to realise this project in the next few months. Well at least the start of it.

So now back filled with vim and vigor I have a new and unlikely project to fulfil.

Thanks for tuning in, and I hope this project excites you as much as it does me.

Cheers from Clint


Sunday 24 May 2015

Reginald Evans (28mm Zombie and survivor)

Reginald had anger management issues even before the zombie apocalypse. He hated his job as an IT teacher in a secondary school. He hated the other staff, his wife and most of all the kids. But that was OK he was hated back with equal measure. This all meant that most of the school kids learnt nothing from him. But then the zombie apocalypse came along and computers, Mr. Evans only real friends, all died.

So taking up the first implement that came to hand, Reggie, as his mother still called him, his wife just called him "the tosser", let loose his bile his anger and his frustrations Not only on the latest version of windows but every computer and zombie he could
find.

Here we see Reginald Evans and his alter ego after the zombie threat. Clearly in the out break period of the zombie apocalypse before he dresses and arms him self for survival. While a dustbin lid is not a recommended tool for urban zombie survival, if it's all you have I am sure you will be glad of it. Maybe it will double as a shield. While parrying is only semi useful in this setting anything that will keep the grasping hands away has got to be a good thing.


Both Figure and survivor are  from "East street Games" And are part of the civilians pack. Unfortunately at this time they are not sold separately so you will get all the survivors and their dead/undead counterparts all in one pack.

Available here  CLICK THIS LINK.  I am sure you will forgive the dodgy camera work and the very dodgy brush work. I have kept all the clothing the same colours on both models and as he is armed ONLY with a dustbin lid have taken this to be in the outbreak phase so the zombie still has a human like appearance. Yes the blood has stopped pumping but the dead figure has literaly just been turned into a zombie so the blood has not as yet pooled at it's feet around the ankles. I did find the figures fun to paint but the details on the castings were not obvious until paint was applied, which did lead to a few errors on my part and a couple of areas repainting. But overall I am happy with it.

I hope you have enjoyed what the other wargamers have done with their versions. All the best. Enjoy the Bank holiday Clint.