Showing posts with label Campaign. Show all posts

Monday, 19 October 2015

Frostgrave campaign start.

Well it was 2 weeks since our start and will be at least a month before the next game of Frostgrave, but we are now up and running. 4 of us are all playing on the same board at the same time! Ian (Witch) Relfie (Necromancer) Kev (Elementalist) and myself as an enchanter. In fact the same types of mages we played in the pre-campaign. We had all changed spells a few times though having seen how goo or bad our first selection was. Mostly for convenience I stuck to almost the same retinue as last time just swapping an infantryman for an archer. Spell wise I decided on the following:
  • Animate Construct (8+)
  • Grenade (10+)
  • Telekinisis (8+)
  • Elemental bold (14+ Aligned)
  • Absorb Knowledge (10+ Aligned)
  • Fog (10+ Aligned)
  • Leap (12+Neutral)
  • Heal (12+ Neutral)
And only a slight change in my retinue 4 archers and 2 Infantrymen (as opposed to 3 of each)

Pregame spells were cast and I got a single Medium construct, my apprentice Called Nigel) missed getting another medium construct by 1. So I was just a little under strength from last time, but not greatly.

We played on a board that Kev had made for nothing or next to nothing. Which really did look very good indeed and even better when you knew what it was and what it cost. needles to say not all the terrain fitted in exactly but we do not generally worry about that too much. The first turn saw a group activation from me and my wizard cast Telekinesis to get the treasure close enough for an archer to pick up. And in the Apprentice phase the archer and loot counter were leaped from the table but the apprentice did have to empower the spell by 3 points to secure my first loot counter on my first turn. There was voiced concern from the other players both at me taking the damage from empowering the spell and also if this was allowable in the rules as the archer had already been activated and the Leap spell would mean that he could do nothing else that turn. But as he was then off of the table I had no further plans for him. Kev Cat a wall (the beige building on the right.) and Ian cast Fog all to stop me getting more loot. Their plans worked! No More loot in turn 1 for me, not that I would have been able to anyway, but both spells did force me to change my plans! (The rotters) Relfie did pick up some loot as well, but Kev had his crossbow man shoot the thug. Which then shuffled of his mortal coil and passed into eternal night. But picking up the loot had bought on 2 skeletons right behind kevs front line. While me picking up the loot had not generated anything!

Turn Two. Ian was getting happy with the Fog and laid down 2 more strips (one from wizard the other from apprentice. I used another archer to move and pick up another loot counter. Which Kev then shot with another crossbowman. Again straight out of the game in a single hit. So I moved another archer to pick it up. Again my apprentice did manage to cast leap spell and the loot was finally moved from the board.. But there were no more easy loot counters to snaffle up. The closet was to Ian but behind the fog so my archers were useless being unable to see and shoot beyond this curtain. Ian's tactics were working well. This did generate a random monster (an Ice spider) right behind me.  (Yeak!).Ian was battling another random monster (a wolf) and snaffling up as much loot as he could while Relfie and Kev were deep in battle with each other and doing physical damage to each others wizards through spells arrows and knowing them harsh (but friendly) banter. The Ice spider badly wounds my infantry that was sent to kill it while my other one just seems to provoke it more. I gernerally move up using the Wall Kev created as cover and get my construct close to Kevs apprentice. Next turn I will strike!

Well again my plans did change as I did manage to kill one ice spider but then another appeared in exactly the same place. I have come to hate Ice spider.

Turn 3 my construct engages Kevs apprentice in melee . Kev and Relfie continue the wizard battle and both take serious wounds. Ian Gets 2 loot counters from the board while Both Kev and Relfie manage to bag one each. I don't get any this turn  but do move an archer ready to pick up another one just before Kev sends an infantryman to attack him. So we both stand over it and neither of us can pick it up as they are fighting. Ian continues to cast fog and cuts all lines of sight and while he does try to move an archer to shoot my Wizard (who is called Dave!) the fog is too high and he cannot see over it despit3 his elevation. But He can shoot at one of Relfie's, so he does do that instead. There is a little sparing between the archers of mine and Kev's but it is mostly indecisive.
The battle with the Ice spider continues to rage and I do loose an infantryman and have another seriously wounded. These two ice spiders have cost me dear in terms of both men and time. But eventually they do both die. but have cost me 1 dead infantryman and one severely wounded (2 HP left) and have kept them out of the fight in the game so far.

Turn 4.Kev's wizard is badly wounded and takes the very wise choice of getting out of the way and out of line of sight. Seeing how badly battered I am Ian takes the fight to Relfie and picks up another loot counter. It does generate a mosnster (Wild dog) and guess where. Yep right behind my wizard. The places are all rolled randomly, it just does not feel like it sometimes!

Some of the fog starts to disappear, as does The wall I am using for cover. leaving my wizard and apprentice in the open. Both severley wounded and both only on one action. I scurry them both into cover out of sight as best I can. Kiev still gets a crossbow shot at my wiz but the dice gods smile and he misses.

My construct also has some favourable dice and puts Kev's Apprentice out of the game. Things are not good for Kev as his Wizard is also hit and put out of the game by Relfies Necromancer (I think he used a "Steal life "spell). But Relfie is also in a bad way as well and taking his second loot counter moves his wizard of table.

Turn 5. I am down to my last few men and everything is wounded. Kev is able to pepper my construct with arrows and crossbow bolts and it goes out of action. I have one wounded archer one wounded infantryman as well as both my enchanter and apprentice on 4 hits or less. With his single action the enchanter kills the wild dog. While the single action of the apprentice fails to cast a spell and instead takes a single wound leaving him but 1 left. At this stage Relfie runs his final figure from the board and the game ends.

Aftermath:
Ian ended on 290 Exp and 3 loot
Relfie on 270 exp and 2 loot
I was on 200 exp and 2 loot
Kev's wounded Wizard failed to recover from his wounds and will be starting again from zero in a months time.

Loot wise managed to replace my losses (except the construct which rolled a natural 1. Kev must have hit a vital component and I will have to make another one before the next game. I also scored a ring of power (1) which I sold and bought 2 healing potions. And I also had a Grimoire with the "beauty" spell. We did have a brief discussion and decided that the effect of the Beauty spell would be on all forms of attacks including spell casting and arrow fire so for one of my 2 advances I did learn the spell. My second advance was fight +1. This is because it is used in both melee and  shooting and also the apprentice also benefits.

So with two healing potions and 30gc in the bank I start the next game also being able to cast beauty. I also have a nice cosy laboratory as my base.

Overall a good fun game and at several points I had different options which may have changed the balance of the game. I have learnt a lot more about how to play and when to use certain spells as I am sure the other players have,

Thanks for reading, I know it was a long read . And may your dice roll high.


Monday, 9 March 2015

How to lose a campaign part 3

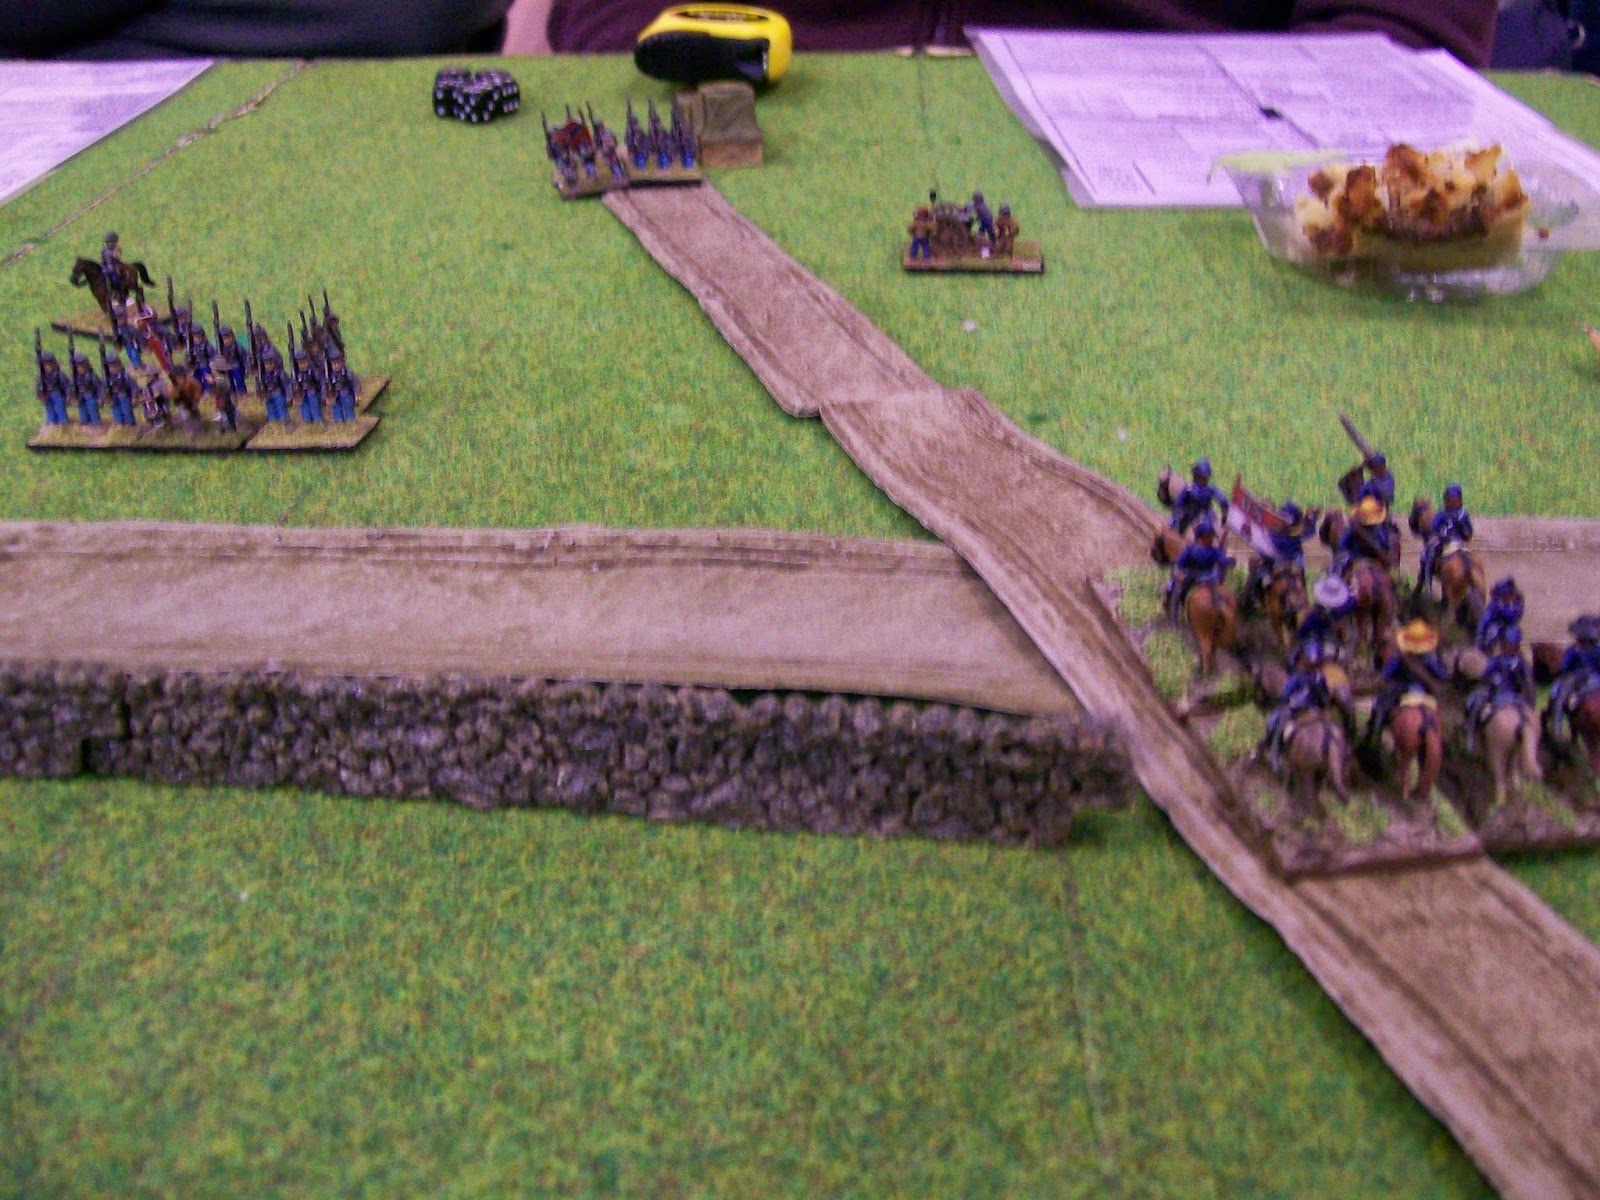
The table set up, Federal troops on the left.
Yes another lose for me and the federal troops. I have yet to win or even draw a game in this campaign and I swear I am not trying to lose it. I read the campaign rules last autumn that Graham had written and made the prediction back before a dice was rolled or a figure was put on the table that whoever won the first game in the campaign would win the campaign. So far I have found that to be the case. I am not having a go at Graham who wrote the campaign rules I really am not but I am enjoying saying "I told you so!"

2nd Objective captured on turn 2 by the Rebels.
Anyway here is what happened this campaign turn. I can already tell you what the result will be for the next one as well. But I will let you guess.

We are playing Civil War battles by Peter Pig. A very well balanced and good set of ACW rules. Not my first choice for rules but I do like them.

My 0ne victory of the day.
 The first upset for me was that as I was again defending I would loose troops from the table before the game started. I had a nice VETERAN unit in the 2nd Objective who rolled so badley they all had to start the game at 1/2 strength and off of the table. Oh well bad things happen in war. And I had 2 other veteran units. 1 started at 1/2 strength on the table, the other at full strength off the table. I did have 3 average intantry units as well and did have 2 of them on the table at 2/3rds strength.

So as Scott and Tim had already Captured the 1st objective in the start phase nothing I could do to get it back. So I managed to move (Just move) an average unit into the farm (2nd objective) to hold it. Almost immediately a veteran Rebel unit close assaulted them. My troops instantly turned tail and fled the board. So the second objective was lost on turn 2!

Foolishly I had put my cavalry too far forward and a second Rebel Veteran Unit managed to charge them, they fled but took some damage . They did stay on the board though. This meant that Scott was able to bring 3 confederate units altogether and keep forcing them back. No complaints my mistake for moving them there in the first place. Eventually by the end of the game they had been whipped out to a man with just nothing I could do to prevent it. Shame but I made the mistake so I will live with it.

Elsewhere on the board with 2 objectives held there was no way I could move the Rebs. This gave me the choice of trying and loosing even more troops of carry out a fighting withdrawal. With each of my units out numbered between 3 and 5 units to each of my depleted units I decided the base action from a campaign point of view was to withdraw.

I tried to get everything from the table while keeping everything in good order. I was still clinging precariously to the last objective. I had a 1/2 strength Raw morale Union Cavalry their and a single (Now Damaged) gun . At the other end of the board I had 2 guns (Undamaged) and a battered Veteran unit that started the game at 1/2 strength . The infantry would not get motivated enough to move from the table. So Scott sent his 5 Infantry units to budge them as he was intent on slaughtering them. Not that I blame him both confederate players played well. I was able to ruin one of his units (an average one) and make another fall back.

But the countdown had meant the end of the game. So another Federal Loss 45 pts to 48. yes just 3 points in it and if we had stayed and fought on the loss would have been FAR greater so with the exception of the bad placement of my cavalry I don't think we did badly. But a loss is still a loss.

The next battle will not see the campaign come to an end. But It will mean from now on I will have to pay full points for units that have absolutely no chance of remaining intact before the game starts. So win or lose the game after that will see what is now a VERY tattered  army take the field.

The way the campaign is set up I am now facing a snowballing steamroller and there is nothing I can do to alter that. Graham (Campaign administrator) will still insist that IF I get a naval battle I could win that battle. And true I still could. BUT my land forces are so battered that the Confederates will continue to attack no matter what happens in a single battle as they know there is nothing I can now do to stop them.

But I will play on.


Cheers for reading. Take care and have fun. All the best Clint

Friday, 20 February 2015

Hooker and Mc Cellan

General McCellan
Continuing the ACW figures for Matt I have finished 2 command stands. Bother are Union Generals. General Hooker and General Mc Cellan. I may have miss spelt them but you will get the idea.

They may well represent both me and Matt in the Club campaign. Neither of these generals was considered very good but that said they are definitely better than me!


General Hooker
The figures are a mixture of Peter Pig and Frei Korp aand as well as the general and flag bearer they also have an aide de camp on the 40mm by 40mm base.

Talking of bases these are clearly not in my normal style as they have been created to fit in with Matts Union Army, just like the Berdan's sharpshooters I showed a couple of days back.

Well that's it for today. I am currently working on a big submission for the analogue painting challenge. In addition I will be going to my first show of the year on Sunday. Yes of course I will take a camera (and spare batteries) so expect either a loot haul or some show pictures on Monday. Talking of loot I have no huge plans and really not much in the way of a shopping list so I am not expecting to get very much (Famous last words).

So until then take care have fun and paint some figures.

Cheers Clint


Wednesday, 28 January 2015

How to lose a campaign Part 2

 Yes we have at long last started an ACW campaign at the club. Foolishly I was appointed the Union General in charge while Tim is the Reb General. It is a fictitious campaign so don't go saying things which may or may not happen as time goes by. It is also a small campaign with both land and riverboat battles. And this is the story of how I loose the campaign part 2!

As we were again defending the Union were allowed to set up the terrain. Which we did with a ribbon of woods and fencing that we hoped to use as a "Stop Line!" We had a farmstead on the right to defend and a road entrance on the left to defend. Given that we had a disaster of a starting set up where the only thing that worked in our favour were the terrain stayed the same. Each and every unit was to start quite chewed up or not on the table MOST was just not on the table. As most of our units have to be 6 bases in total the option of losing D3 stands from each unit before the game  starts is really quite harsh. Still I had the cavalry and the right wing with the farmstead to defend and Peter and Matt the left and the centre when or even If the troops turn up.

The above picture shows all the troops which did turn up in time. 2 units of Cavalry (both 4 stands each) and 3 Artillery pieces. That's all we had to defend with.
These are all our troops which did not turn up at the start of the battle. As you can see not the best start and with so much off the table we really did have to drip feed any reinforcements to where we would need them. At least that was the plan.
 Luckily in the first few turns our support did start to arrive in bits and pieces. And Peter decided to fortify as best he was able the entrance area. (And not get the troops where they were needed). But hey ho his troops and I do try not to leap up and down and interfere with subordinates by micro managing.
 Matt Brings an artillery unit to reinforce the farmstead. It was either that or leave it exposed and unsupported. So I am glad he did so. As the Rebs commanded by Scott move in and then stop outside my long range but within his. Oh well other than abandoning the farm nothing I could do about that.
 I dismount my second cavalry unit to give enfilade fire should the Rebs charge in. This restricts the artillery but as it is now damaged by counterbattery fire it was no longer on top form.
 Eventually the Rebs do attack and drive my skirmish line of dismounted hosemen back deeper into the farmstead. But at heavy losses to them and not so heavy losses to me. Matt and Peter both get more troops on and while the Reb Cavalry move to encircle the farmstead are brought under fire and driven off.

Peter decided to flank march. He succeeds but then his troops are no where near his commander and can't receive any orders. so in desperation (while still in march column) launches an assault on Tim's Rebs who are in an attack line. Well while I will admit nothing of any value is achieved without risk and that it could have been glorious the chances of success really were against him. Yeah guess what. he lost two units from the game and it is unlikely that we will ever get them back in the campaign. Which really hurts. Pete is a "Murdering officer"


 More Rebs assault the farmstead so my second unit of cavalry mount up and ride off. The Artillery is lost another unit in the campaign I can't see us ever getting back. But I hold the farmstead. And one of the reb units will at least need time out of the line.
The countdown clock ends the game and we tally up the Victory points. We have 51 victory points but lose as the Rebs have 67 Victory points. We are not out of the campaign just yet but another loss like that and we might as well be simply because we cannot replenish our losses. We will still have fresh troops next battle but hardly any choices of what we can field. Still it's a game.

Sunday, 18 January 2015

Civil War campaign start.

Yes we have at long last started an ACW campaign at the club. Foolishly I was appointed the Union General in charge while Tim is the Reb General. It is a fictitious campaign so don't go saying things which may or may not happen as time goes by. It is also a small campaign with both land and riverboat battles. And this is the story of how I loose the campaign.

The figures are Matts and Grahams and the terrain is also Graham who is the referee. We have set the campaign in a river valley in the "Eastern Theatre Mid war period. Using the Peter Pig "Civil War Battles" rules we went through the "pre-Game" and the Rebs were attacking the federal homeland. So the first game was a Union defence. Gulp!

 We, Peter, Matt and Myself had to set up first and as there were 3 objectives one of which was in the confederate starting area and the other two closer to our starting position we had to leave the right hand 1/3 of the board hanging open in the air. (Thems the rules). The Confederates took advantage of this and had half their force attacking that sector and cavalry attacking our left wing.

Above you can see the rocky outcrop which was one objective. Centre of the board .And our open right wing. Peter took the left wing and Matt the centre and guess who was on the right. Yeah me!
 Peters left had a lot of troops that did not arrive in time for the battle but would roll each turn to come on. The bad news is that due to the pre-game the confederates had cut the road and thus making the roll for reinforcements harder.
 I did have some troops to move into the open right flank. but I kept one unit in the farmstead as they had better cover there.
 Well that plan did not work, Scott and Gary sent three units against the one in the farm and then charged with a veteran Red Infantry unit. My troops thought better of it and ran away without much of a fight! They skidaddled so far and fast that they went of the table never to be seen again. (Maybe they will come back in the campaign and maybe they won't as I will have troops that don't run that need bolstering! Time will tell!)
 Peter on the left also had trouble. Because he had troops just arriving Tim was able to use his cavalry like paratroops and take an objective and try to hold it until his foot could arrive.
 I went marauding with my cavalry on the right. While the cavalry did take a bit of a beating they are only a raw unit I was able to tie up twoe of Scotts . infantry units and a gun battery in the process.
 Matt (my side) and Gary( the confounded Rebs) slogged it out in the centre trading blows in a tit for tat manner. This kept on all game with little give or take and it really was a slogging match.
 This is when my Cavalry broke and failed a morale check. They only had to retreat and not flee the table so I was quite content as they had kept Scott on the right flank busy for most of the game.
 Scotts Veteran Reb unit that had taken the farm were closing up behind my blue boys.
 My Federals were able to get one round of shooting into the rear of Scotts Infantry who had not recovered from seeing my cavalry retreat battered.
 Matt still slugs it out with Gary. Matt launches a charge and the charging unit is not able to push through. they get thrown back with lots of casualties.
 Scott gets another unit onto the rough hill objective but stalls just outside canister range. And they start to suffer because if I can't fire canister I will fire something else.
 Meanwhile on the left. Peter forces Tims cavalry to mount up and leave the church objective. Straight into Peters cannon which was able to fire canister! That dealt with half of Tims cavalry!

With a swift move along the road I was able to bring my union forces behind Scotts troops on the rough hillwhile I battered it with my guns and Matt brought a raw unit into the line (It had only arrived 2 turns before)!

And then the game ended. Victory points were awarded and the final score was Confederates 47 points Federals 46 Points.

Which means that I have lost the first territory in the campaign.

Next weekend at the club the campaign will continue as the rebs push further north!

Thanks for reading. I meant to post this yesterday but time just got away from me. Have a good couple of days and I will post again soon.

All the best Clint

Sunday, 14 April 2013

"My Hits don't lie!"

Firstly I want to say a big thank you to all my followers, lurkers and casual clickers who stumble upon my blog. As I type this I have had 24 970 page views. Just 30 short of 25000 which is a milestone to me. I am not going to do some give away promotion to attract more members I would rather pass on my thanks to you all who make Blogging so much fun enjoyment and yes at times frustration. Cheers Guys I really appreciate it.

I have learnt a lot from the honourable Fran and have included the picture above to introduce my recent wargames thoughts. Followers of the blog this time last year will have seen my build of an Afghanistan village. It has not been used since and that's a shame so I have been thinking of alternative uses for it. Given the architecture and the layout it could easily be used for a lot of different periods, anything from late medieval to near future. A magazine editor did suggest I use it for the 1st Anglo- Afghan war as he wanted to do a series of articles about wargaming in Afghanistan through the ages. Being honest the idea never really floated my boat so it went no further. Which knowing me will mean I will no doubt start it in 2 years time!

 Finally coming to the point the boards would work well, for some other middle eastern wargames. So recycling the Afghan boards and with reference to the picture above I intend to use Salute this year to check out the possibility of the Arab Israeli wars.
1948 has some interesting features but is perhaps a little too similar to WW2.
1956 again possible and with British and French Support gives it more variety and versatility, but the overall feel is still to similar to WW2 despite the fact that it had the first airborne helicopter assault. But one battle does not make a war.
1967 "The Six Day war" does appeal there is a variety of forces Israeli, Egyptian and Syria many of the vehicles are still WW2 vintage Syria was using Panzer Mk IV's, Egypt T34/85s and Su 100s along with more modern tanks like T55s and "Super Shermans" (used by the Israelis).
1973 "Yom Kippur War" again appeals as the Israelis start on the back foot. Weapon systems have improved. The Egyptians backed by the USSR have Sagger Anti Tank Wire Guided missiles T62s BMPs and BTR 60s as well as many of the older vehicles such as T34s. And as a war fought on two fronts has many interesting prospects from a wargaming point of view.
1980+  More up-to-date vehicles still including the Merkava the most well known Israeli tank. Is a period that is also possible as a wargames period perhaps with things like Operation Opera (The Isreali strike to destroy Iran's Nuclear facilities.)

Obviously the above has glossed over all the conflicts in a mere line or two, when any number of books have been written. So it is definitely over simplified  in the extreme. It does seem to be at present an era of wargaming that is pretty much under played at the moment and yet perfect for my Afghanistan wargames terrain. It should also be a lot less controversial.

A very quick look has highlighted the lack of figure manufacturers for these conflicts but a wealth of vehicle makers. But this as mentioned above will be something I want to look at while present at SALUTE this year.

Thanks for Reading, more on Tuesday have a great couple of days and I hope something above has caught your interest.

All the best Clint

Monday, 14 January 2013

Caen Turn 1

Yesterday was a club Sunday and it was booked for the first turn of my Caen Campaign. Of the 5 Canadian squads only 2 were due to fight. This was due to the moves being carried out on the campaign map. All the squads were moved, one squad moved into a minefield and stopped and then withdrew, 2 squads advanced into empty grid squares while the other two "discovered" the Germans players.

Relf on the Left and Dave on the right.
One battle was between Relfie and Dave, with Relfie, as German defending. As the defender I allowed Relfie to start the game hidden which he took full advantage of. Dave moved the Canadians up along a broad front and Relfies Germans opened fire. With typical club luck Relfie managed to run out of ammo on 3 of the five figures who fired and would need to let them spend an action reloading before they could fire again. Despite that the shots were quite effective and a couple of Canadians fell. Relfie's squad also had a mortar which he managed to use to some purpose. Given the 10cm blast radius Dave had little real choice but to have a couple of figures as a target each turn. The mortar was able to keep at least 2 figures pinned and did eventually manage to get a succession of wounds on Dave's bren team and take the assistant out of the game. It was a good battle but given the Germans had about double the points of the Canadians, Dave's forces did eventually crumble.

The other battle between Tim (Germans) and Graham (Canadians) highlighted Grahams tactical skills and Tim's mad (low) dice rolling. Graham advanced in a very narrow front and soon realised that Tim's dice were up to his normal standard (which is to say less than good). Graham was able to concentrate his actions/reactions and firepower into a very small are of Tim's thin camouflaged line. As such Graham poured fire onto Tim's MG34 with sufficient force to wound the gunner who did not have  an assistant (His second MG34 did have an assistant). From that moment on Tim was always on the back foot and despite moving his sniper asset to a better position was not able to turn the tide. When in position the sniper was claiming a Canadian each turn but as the rest of Tim's troops crawled wounded to their fellow squad members. Unfortunately it was too little too late and Time German squad conceded that grid square to the Canadians. Graham did admit afterwards that he was on the verge of withdrawing when confronted with the sniper but as Tim's squad was badly shot up Tim failed the morale check (from Grahams point of view) just at the critical moment. Overall another good battle but with a surprise result.

Campaign wise I need to  send out the maps for the next turn and tell the players where they stand with regards to casualties, replacements and other issues. I will also need to apply the effects of things like preplanned artillery, air strikes and similar events. These are dealt with very simply I roll d6 for each event, German artillery, Canadian Artillery etc and if they roll lower that the dice I roll for the battles they happen before the battles and if equal or higher after the battles. As this turn I rolled a 1 for the battles everything happens after the games are fought.

We also had a little time for a very brief excursion into Full Thrust. Ian and Relfie are now looking to possibly start fleets. As GZG do two starter fleets for £30 I would suggest this would be a place for them both to start.

I think the real high point of the day was the arrival of John Lambshead (http://johnstoysoldiers.blogspot.co.uk/) who used to be a club member and whom we all hope will return. Overall a very good club day very enjoyable and the campaign has taken it's first real steps.

Monday, 7 January 2013

Progress report.

Well I am not sure what's happened, but I can't upload pictures from my computer to this blog at the moment. I am sure there will be a way but it will probly take me a while to work it out.  But until I do I will just give you a non visual progress report.

Circus: \I have re-attached everything that fell off and am now waiting for the glue to dry before carrying on with the next stage. I hope to have a couple of pics of that when I work out how to post them.

Caen Campaign: We should be playing the first real games on Sunday. At present I am making some more bocage for the tabletop. (about another 20 feet's worth.) This should be ready to go by Sunday as I am at the stage where I will be doing the grass borders.

Apaches: I have also painted up a few more stands of Apaches for the project I started late last year. Still a huge amount to get done, but if I manage to do some every so often I will not notice the pile shrinking.

Well that's what I have been doing, but without photo evidence you'll just have to take my word for it.

All the best, and Hope to speak soon and with pics Clint

Post Script: If the pic below coms out I have Semi solved the problem. (Now just to check)


Monday, 17 December 2012

Caen 0.1 AAR

Ian and Grahams Position end of turn 2
The Caen Campaign has started. The first battle was always to be a learning experience as there were 7 people playing the one game and only tow of them had played the rules before, although another one had managed to read them prior to the game. The first battle was a very simple affair of 2 Canadian squads advancing across the Normandy Countryside to make contact with the Germans. I split each squad down so that each person had a single fire team with either a Sergeant or Corporal in charge. These were to be very similar squads to the ones each player will get but as a campaign pre-game it was disclosed that they would get fresh squads for the campaign and as such this was a learning game.

The Canadian players were (in proximity to my seat):
  • Ian
  • Graham
  • Kevin
  • Dave
While the Germans were:
  • Tim
  • Relf.
The Germans were allowed to set up 40cm from the table edge while the Canadians (who were advancing were allowed a 10cm start zone. The top picture shows Ian and Grahams Canadians at the end of the first turn. taking the left flank they were advancing on Tim's 1/2 squad. The small yellow dice was the first shot of the game (by Ian) and having thrown 3 of a kind on the dice the gun was out of ammo much to the mirth of the Germans (and many of the Canadian players as well). Ian was trying out al the rule options as he wanted to learn the rules as swiftly as possible.

Tim's position end of turn 2
Tim's Germans were always intent on occupying this building but as it was outside of his deployment zone he could not start in position and had to spend a couple of turns moving troops before he was ready for the Canadians. Unfortunately I had deliberately left this building with Very restricted fields of fire with a small wood directly across the other side of the road from it.  A better place for Tim to have started was about a foot to his left but the building was just too tempting a location. I can't fault Tim too much I am sure I would not have spotted it and concentrated on the building as well. By the time Tim was in position the Canadians (Graham and Ian) had also moved into positions which gave them the optimum cover bonuses. Tim did manage to wound one of Ian's chaps with a rifle shot at extreme range which left that figure crawling around for the whole game.
The long range shooting between German and Canadian riflemen lasted for a while which gave Ian's section time to get to the other side of the woods ready for some close in work. Graham managed to pin the German LMG which gave Ian the chance to rush the building. A lone runner with a grenade skirted the woods and was about to throw the grenade when Tim snatched the order priority and let rip with the corporal and the MP40. The grenadier was cut down in the middle of the road in front of the house. But knowing that the corporal could not fire again in that turn Ian sent another chap with a ready grenade out into the open. Hurling the grenade through the window it exploded inside and took the Machine gun and crew out of the game. Tim's Corporal was also shot down by Ian's sergeant's sten gun and pinned. Tim got the corporal out the back of the house but his rifleman by the parked car was picked of by Grahams rifles. At this stage Tim was down to just 2 figures. Seeing that Ian could mop them up Graham wheeled to bring fire on Relfies section. In a desperate last ditch attack Tim tried to lull a similar grenade trick on Grahams troops. If it had been successful the Canadians would have been on a morale check so it was one of the last moves of the game on this flank. Fortunately for Graham his Sten carrying Corporal won order priority moved and fired and killed the German before he could throw the grenade.
Kev to the right Dave to the left Turn 2.
Across the other side of the Battlefield Rolf's Germans were all set up and hiding from Kev and Dave's Squad. Moving through some woods to the edge of the treeline these Canadians used the rule that you can always target a support weapon (in this case the Light Machine gun of Ralf's) to try to keep it pinned with long range rifle fire. The tactic worked quite well for a short time but eventually the belt fed MG was able to lay down a hail of fire into Kev's 1/2 squad that tipped the balance. The LMG can fire 6 times in a turn as opposed to a single rifle shot. Dave was managing to stay out of the line of fire and snipe at the German riflemen that were protecting the MG34. One of these players did manage to kill the Mg34 gunner, but the assistant took over. The Mg34 did it's work and killed enough Canadians to put them on an immediate morale check before Dave could shoot back. Very bad dice rolls that one normally attributes to either myself or Tim forced the Majority of Kev and Dave's troops off of the board as they either retreated or hunkered down unwilling to fight. By this Time Graham was starting to lay down some fire on Relfies bullet ridden abode. However the Germans snatched initiative and Relfie turned the MG 34 on the line of Graham troops.

Relfs starting position from which he hardly moved.
 Mg Team upstairs in the building
 and the purple dice indicating
which troops were hidden.

Unfortunately Relfie did not realise that Graham had a Bren Gun and therefore did not target it. But the MG did well and killed one (by inflicting 2 wounds) and pinned another. The Bren gunner returned fire and with 4 shots as a rate of fire was able to kill the MG gunner on the top floor. As time was now pressing Kev sent his NCO out from the woods into the open, but was not close enough to fire his Sten. As Relfie won initative the next turn he charged forward with his Sergeant and an MP40 Kev Relf and Graham all rolled of order priority (Relfie even had a re-roll due to veteran status). Graham won and the Bren barked again and the sergeant fell grasping his chest where he had hoped a medal would have been pinned. This put the Germans below the Break point and the took a morale check for each figure still active and conceded the game.

Conclusion: Over all the rules worked well and players seem to appreciate both the simplicity and the feel of the rules. We did make a few mistakes, but not too many I think. (Until Graham emails me and tells me all the things I got wrong). The Main criticism seems to be that it is no harder to throw a grenade through a window from across a street as it is to throw it just on a random section of ground. a simple house rule can fix this though. Overall not a bad start and now most of the players have tried a game they should be able to play mostly just from a crib sheet. So all in all I count it as a success.

Thanks for reading this report. I hope to post again on Wednesday, til then all the best Clint.


Saturday, 15 December 2012

Caen Campaign Start Tomorrow

I did not think I would get a chance to write today as I have been rushing to finish getting ready for the Caen Campaign which will start at club tomorrow. So Nothing I can show at this stage, as it is all paperwork, squad rosters, maps and pre planning. The game we will play first will be an introduction game to get people a basic understanding of the rules we will be using. I am expecting it to go slowly as most large games do when they have many players. I might be surprised and it might go very quickly. If it does I'll raise the break points for the squads so they hang around longer but I don't think I shall need to. If it goes really fast we can always play a couple of games.or more likely play something else.
 
So the basis of the first game is that it is set one day before the campaign actually starts. The Canadians are under orders to advance to make contact with the Germans and thus establish a "front line". Once the front line is established the campaign can start. Historically speaking this section of the Normandy Campaign Monty's plan was to exert pressure along the line to draw German troops into the battle. By drawing the Germans close to Caen the Germans would need to weaken their front line elsewhere which would then allow the American beach areas to break out in "Operation Cobra". There were a number of drawbacks which stopped this being as successful as envisaged. But given that each player will be given a single squad, say 10 men, then the bigger picture need not be explored too greatly. After all war is a very personal experience and the man on the ground usually only gets to see about 100m from where they are standing at any one time.
 
Not really much of a post, but I have already put the camera in my bag so unless it falls apart an AAR of Monday. All the Best hope to give you a fuller report on Monday. Til then take care keep warm and if you can get some painting done. All the best Clint

Thursday, 13 December 2012

20mm plastic soldiers.

Yes I know the world and his dog have seen 20mm plastic soldiers enough to last them a lifetime, if not longer. I thought I should offer some proof that I have been painting ready for the Caen Campaign. So here and below are just a couple of pics which show both the Brits and the Germans together with their corresponding poses. All the figures are from "the Plastic Soldier Company" and a box set of hard plastics retail for about £10 give or take. Lots of the figures are in two or three pieces, but once cleaned up the fit together very nicely. Each box contains 3 hard plastic sprues with 10-11 different figures on each sprue. As you can see with these two riflemen many of the poses are very similar but with different nationalities. I have no issue with this as they will not be put next to each other like this on the games table. The Canadian uniform is straightforward Khaki with hi-lights and shading and actually takes as long for me to do as the German Camouflage (Oak leaf spring) pattern. I don't hi-light and shade my camouflage patterns at any scale smaller then 54mm, they simply don't seem to need it!
These next two are Light machine guns on the move. The molding and angle do much to conceal the Germans MG34. But the Canadians Bren Gun is prominently on display. Given the rules we shall be using (Operation Squad) the two weapons are very different. Just as they were/are in real life. This is one aspect of the rules which appeals to me. The 30 round magazine for the Bren does a lot to restrict it's rate of fire due to reloads. While the MG34 could have a magazine, but could also be belt fed.

The Last pic for today shows each nations medics. Medics in the campaign might become very useful when players want to patch up troops on the front line. Only a few squads will have medics attached the others will just have to make do as best they can. This is simply because the lieutenants either spent the points on medics or did not. And the players will each be given a RANDOM squad. So I expect most squads to have no medical benefits, mind you the choice of how to spend the points was not easy for some people.
That's it for today. Thanks for popping by and talk again soon. All the best Clint.

Friday, 7 December 2012

German Squad Transport.

Here we have two Horsch 4x4 troop carriers. These were the squad level transports used by the German Regiment that will be played in the Caen Campaign. They are 20mm Resin cast modes from FRONTLINE (Frontline Wargaming). They come as five peice kits the main casting and 4 wheels. Quiet nicly sculpted and cast and they go together easily and without fuss. As you would expect from the need to just attach the wheels. Quick simple and easy, just how I like it. As you can see I have not gone overboard with the paint scheme I have tried to keep it looking scruffy and unkempt the kind of vehicle which will do the job but without any frills.


There is still a lot to paint for the campaign but it is getting done at the right pace for me. However you should expect the next few posts from me to be centred around this task. I still have a lot of Canadian troops to paint as well as a couple of German. There will be very few vehicles on the tabletop so don't expect too many more to be blogged by me in the near future.

As you can see by the black and white photo of the real thing it is not the most glamorous and exciting of WW2 vehicles but it does serve a distict purpose of carrying a single squad and thier kit to where-ever they are needed be that across a farm in France to the depths of Russia or even through the deserts of North Africa. I don't tend to see too many of these on the wargames table as most games tend to concentrate on larger elements than squads. I think one of the reasons is that we tend to go tank heavy. I can honestly say I have seen more Tigers being used in wargames than these.

Elsewhere in my wargames life the Kickstarter run By Fasa was cancelled last night.

Below is the explanation I was sent and my moey returned.
"Dear Valued Backer,
Our project of 1879 iPad App, RPG, miniature game and figures has been live for over a week now. Based on the number of project backers, pledges and trends it looks like meeting our goal will be very challenging. Considering all of the factors, we have decided to suspend our project as described.
I would like to thank you for backing our project. Your commitment is what Kickstarter is all about.
We had hoped that the combination of miniatures, RPG and software would appeal to a large number of backers. Unfortunately, this has not been the case. So while work on the core miniatures game and rpg will continue, albeit at a slower pace, work on the iPad application will be halted.
Look for a revamped Kickstarter project early in the New Year. This streamlined project, focused on the new 1879 game system and miniatures, will hopefully be more successful.
Once again thank you, and if you decide to participate in our future projects, we will see to it that you receive something extra.
Thank you,
Ross Babcock"


So that's it for today more again on Sunday weather you want it or not! All the best Clint